

This blog post starts the Zigbits Blog Series on Cisco ISE (ZBISE). In this series we will be using Cisco ISE and a number of other critical infrastructure systems and services. Lets jump right in.
Update: Here is the video recording of this blog in action!
Pre-Requisite information:
- For the ISE Nodes
- Hostnames
- IP Addresses
- Subnet Masks
- Default Gateway
- Local admin account name
- Local admin password
- For your Environment
- DNS server / name server IP addresses
- DNS Domain / Fully Qualified Domain Name for your environment
- NTP server IP addresses
- Timezone
The Steps!!
1. Download the Cisco ISE 2.3 OVA for your specific deployment
What version of the OVA file you will be downloading will depend on the overall design you are deploying for Cisco ISE. Maybe you are doing a standalone deployment in a lab or for a small organization in which case a single ISE Server will be sufficient. On the other hand, maybe you are going to be deploying a Global ISE solution so you will be planning on configuring a Distributed ISE solution with multiple ISE Servers running different personas. In my case for this blog I am doing all of this in my home lab environment so I will be using an OVA file that I have handy.
2. Deploy the Cisco ISE 2.3 OVA in your VMware environment
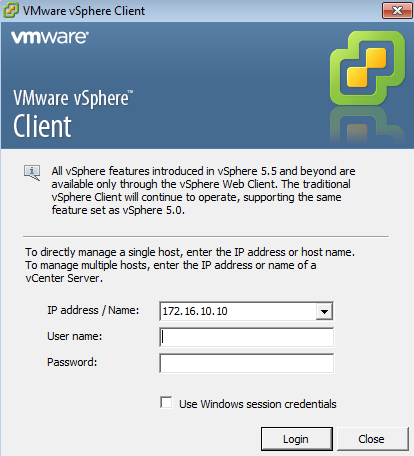
Launch and Login to your VMware vSphere Client
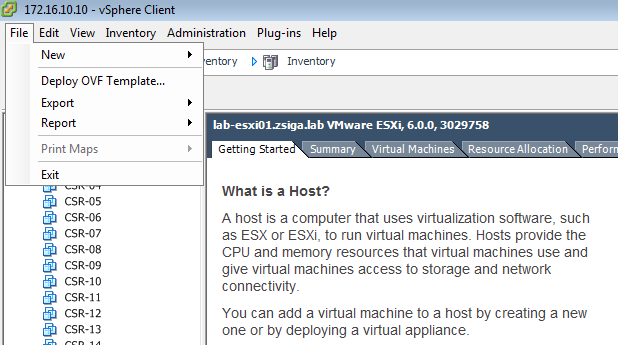
Select File, then Deploy OVF Template…
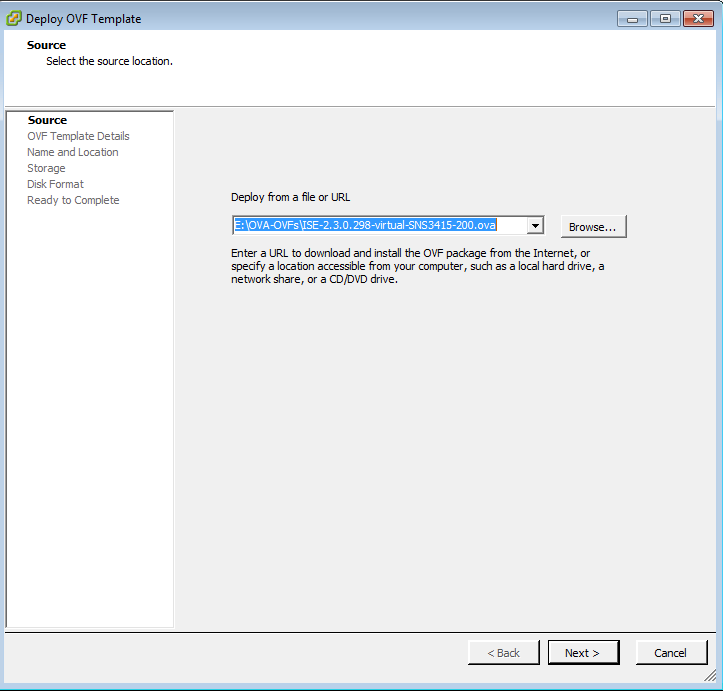
Browse to the location where you saved the Cisco ISE 2.3 OVA file you downloaded at the beginning.
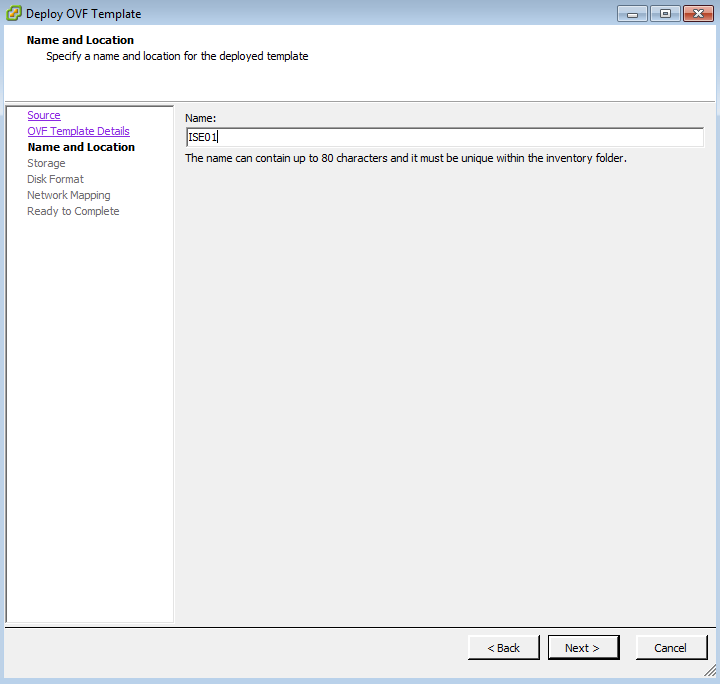
Give your ISE VM a name, in my case I’m naming my ISE VM ISE01.
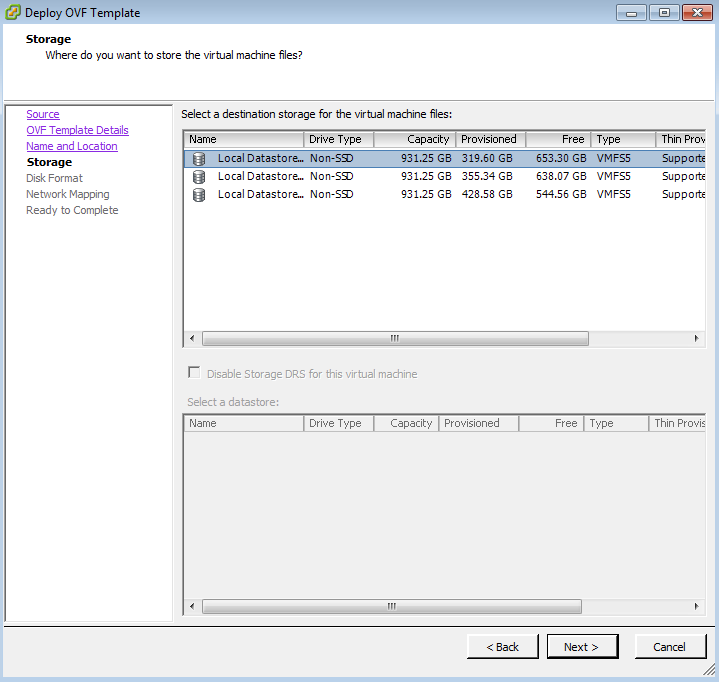
Select your appropriate Datastore for your ISE VM’s hard drive. Make sure there is enough space for the specific OVA you are deploying.
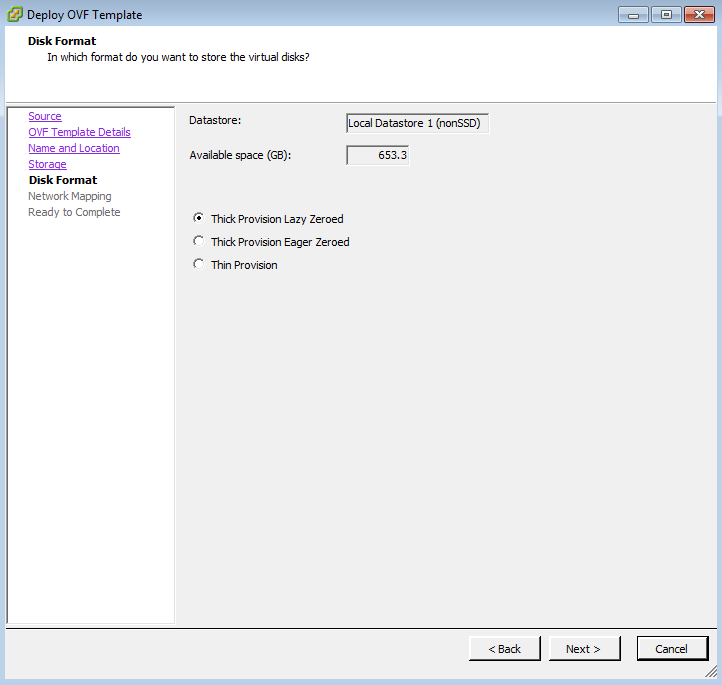
Select your appropriate hard drive format between Thick Provision with Lazy Zeroed, Thick Provision with Eager Zeroed, or Thin Provision. For my lab I am using Thick Provision with Lazy Zeroed.
Select the appropriate Network Mapping that your ISE Server should be on in your environment. In my Lab this is my “Server Network” in VMware.

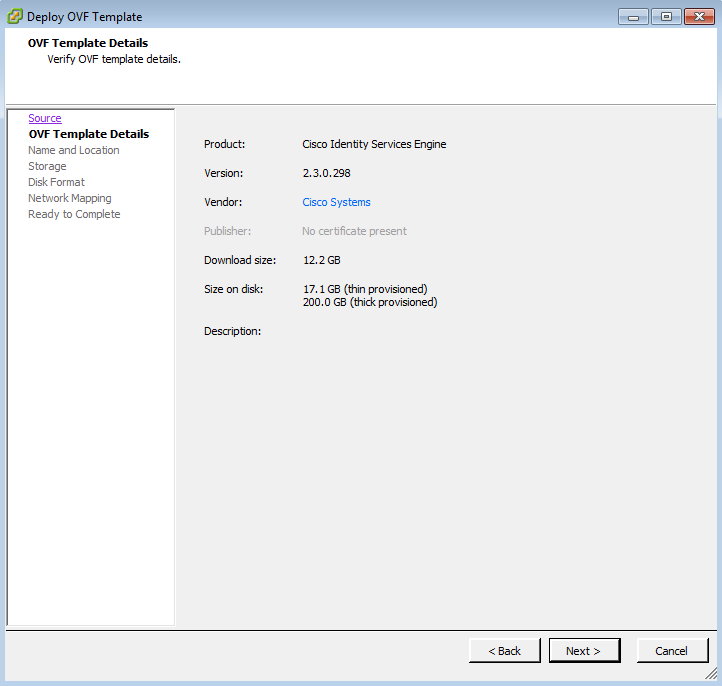
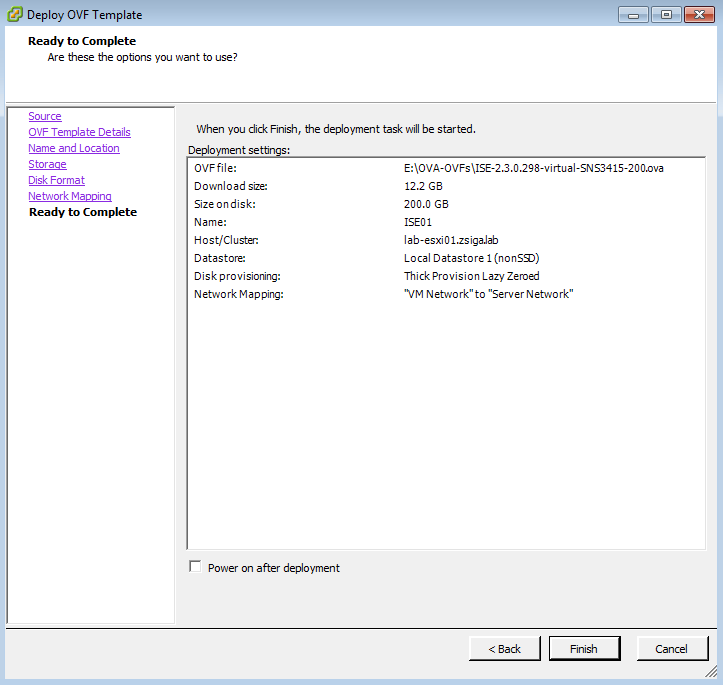
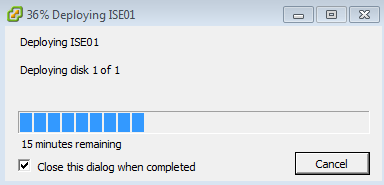
The next screen that is displayed is a summary of the configuration options you have selected for this OVA deployment. Review these settings and then click finish to start the OVA Deployment. You will see a progress bar showing you how far along in the VA deployment VMware is.
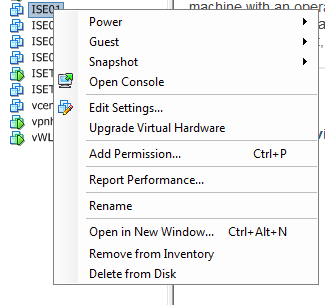
Once the OVA has been deployed and your VM is now showing up in VMware, you can change any settings you need too. For my deployment, I am going to remove the resource reservations on the VM because I do not have enough resources, memory or CPU, to start the VM. In a production environment these resource reservations are there for a reason and should be left alone.
To do this, we will right click on the VM and select Edit Settings.
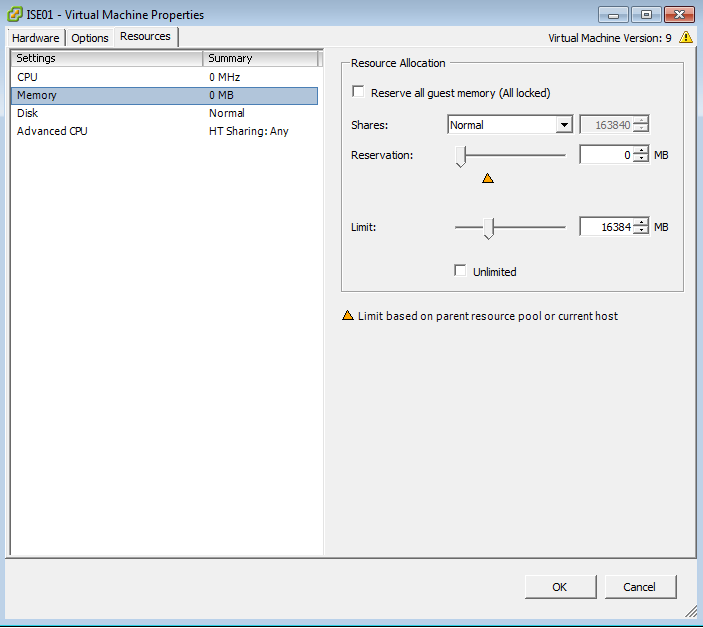
When this next window opens up, we want to select the Resources tab

On the Resources tab, we want to select the appropriate resource and move the reservations slider down to 0. When satisfied, click OK to save the changes.
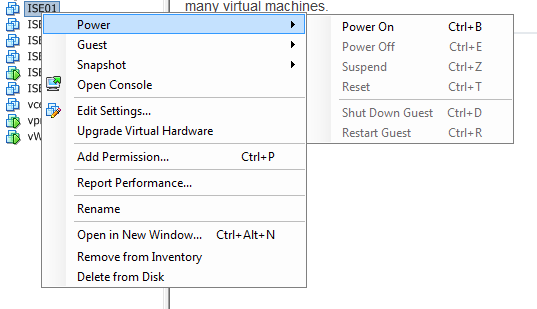
Now we are ready to Turn on the VM. Right click the VM and select Power -> Power On!
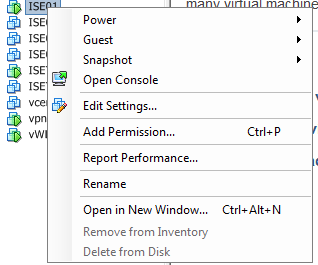
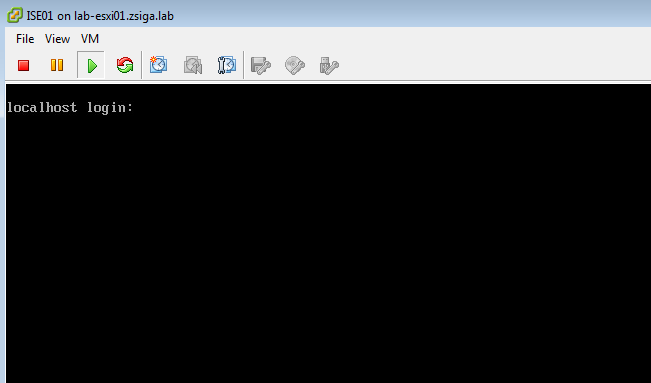
With the VM starting, we now want to connect to the Console of the VM. To do this, right click the VM and select Open Console.
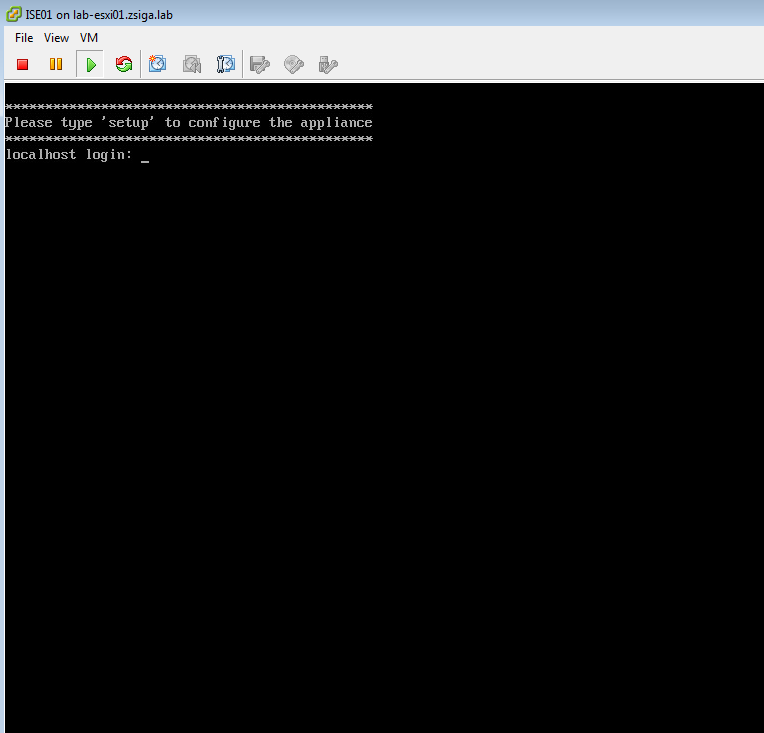
With the Console open, you should get a prompt like the one below.
3. Initiate the Cisco ISE 2.3 Setup Script
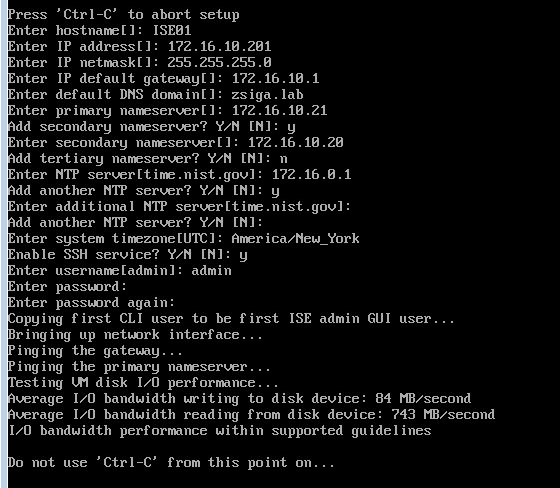
Go a head and type setup on this prompt in the ISE VM Console window. This will start the ISE Setup wizard / Script that will prompt you for the necessary information for this ISE Deployment and this ISE Server.
In this step we will need the following information:
Hostnames, IP Addresses, Subnet Masks, Default Gateway, Local admin account name, Local admin password, DNS server / name server IP addresses, DNS Domain / Fully Qualified Domain Name for your environment, NTP server IP addresses, and Timezone.
Here is how the setup script should look with my lab information supplied.
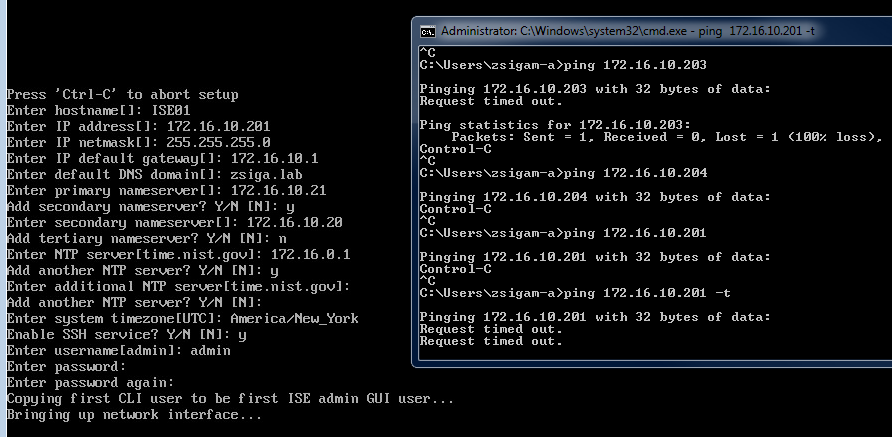
Before you walk away for some coffee or in my case Redbull, I always verify network connectivity to the ISE Server. I open a CMD window and ping the ISE Server IP Address I gave it in the Setup Script. The below screenshots show how this looks from an implementation perspective.

At this time, the ISE Installation is going to take on average 45 minutes or so to complete. This is a good time to do other tasks or take a break.
4. Verify Applications are running after installation is complete
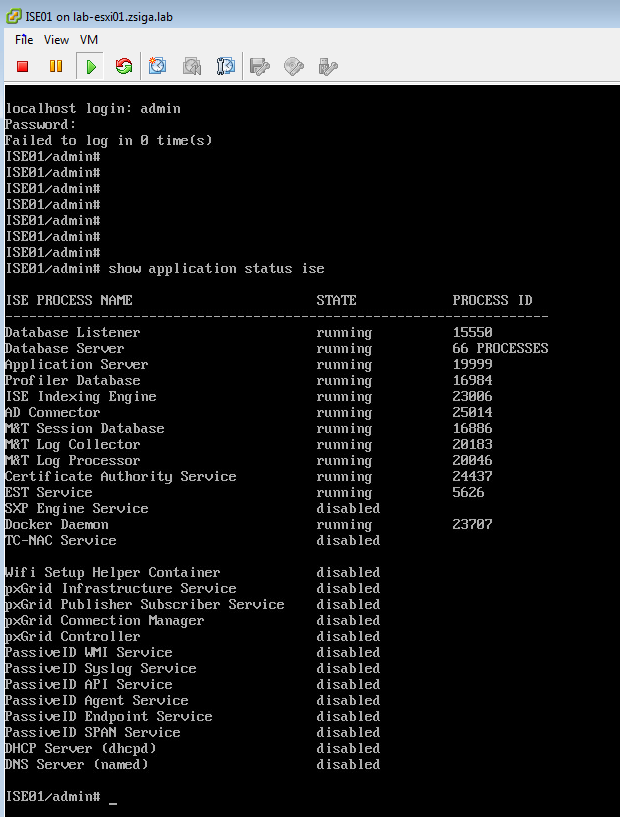
Once the installation is complete, you will see the below prompt in the VMware console window.
Go a head and login with the Admin username and password combination you supplied in the setup script. At this point I always verify that the application Server is started. Once logged into the ISE server in the VMware Console, issue this command “show application status ise”, you will get the following output. The key item to check here is to make sure that the Application Server is in the running state.
5. Verify you can log into the web front end (HTTPS) and SSH.
Before I do any other tasks for whatever ISE deployment I am doing, I like to verify SSH and HTTPS access are working appropriately as I will be using both consistently.
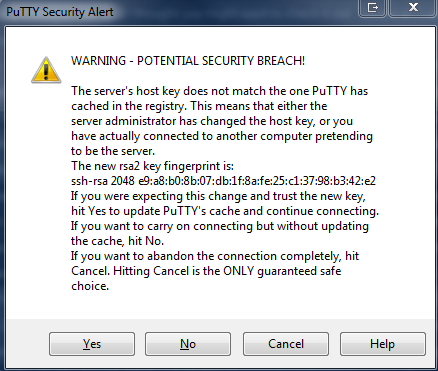
To verify SSH access, launch your preffered SSH client, in my case I am using Putty. If you get a Certificate Host Key warning, accept it by clicking yes. It will look like the screenshot below. When the prompt asks for a username / password combination enter the admin username and password you supplied in the setup script.
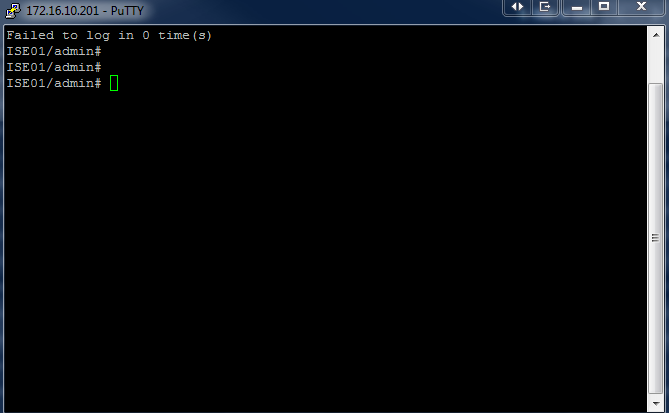
Once logged into the ISE Server via SSH, you will see a similar prompt as to the VMware Console. Go a head and exit the SSH session.
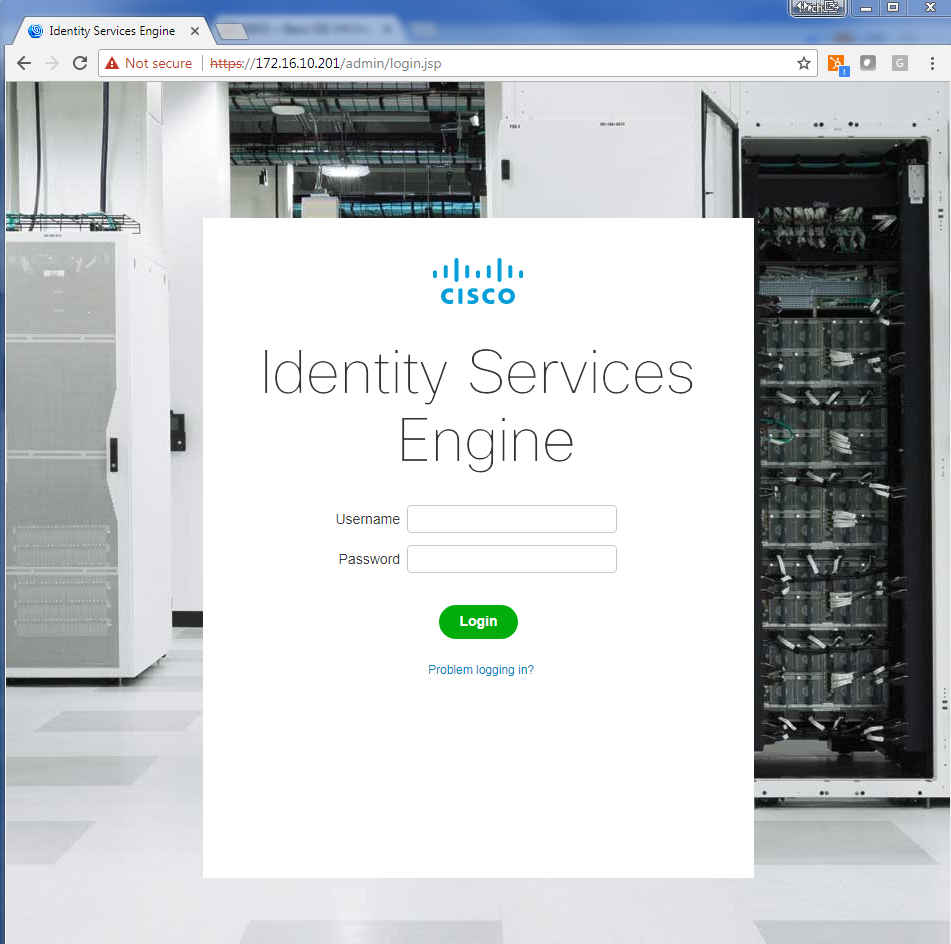
To test HTTPS access, I launched Google Chrome and browsed to the ISE Server’s IP address over https. You most likely will get a Certificate issue in your chosen browser, because the ISE Server is using a self signed Certificate currently. Just accept this to get to the ISE Server login page.

Once at the ISE Server login page, you can once again enter the same credentials you entered during the setup script for the Admin account.
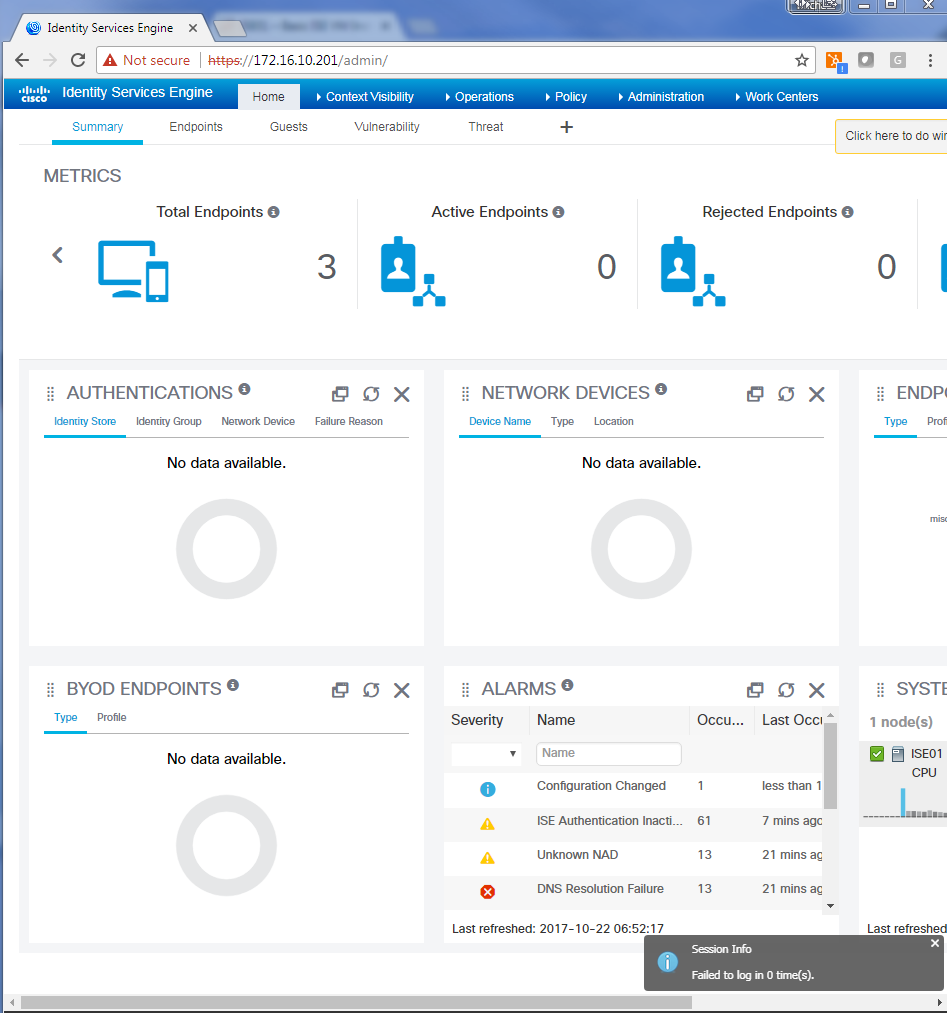
Now that you are logged in, you should see something similar to the below screenshot.
That’s it for this Zigbit! Stay tuned for more Cisco ISE 2.3 blog posts soon!
Ask questions and give feedback
- You can leave a comment on the blog!
- You can leave a voicemail at (617) 913-4103
- You can email us at Feedback@zigbits.tech
Engage with Zigbits further:
- Subscribe to the podcast on an iPhone or on an Android
- Follow Zigbits on Twitter!
- Follow Zigbits on LinkedIn!
Engage with me further:
Transparency:
This post may contain affiliate links to products or services were I may receive a level of compensation from your actions by following those links. This is seamless to you and does not add any additional cost to the products or services in question. In addition, I do not let any affiliate relationship cloud my judgement or my recommendation of a product or service. My recommendations will always be above reproach. This is my commitment to you Ziglets!
A good post. Please continue the detail of ISE 2.3………………….
Thanks..