
 Hey Friends, Nerds, Geeks, and Ziglets, in today’s installment of the Zigbit’s Cisco ISE 2.3 Blog Series, we are going to create all of our Wired Authorization Profiles, or permissions. These Authorization Profiles will be used once we create our Use Cases over the next few installments. Lets jump right into this, shall we?!?!?! 🙂
Network and Server Diagram:
Here is our reference diagram that we will be using throughout this blog series.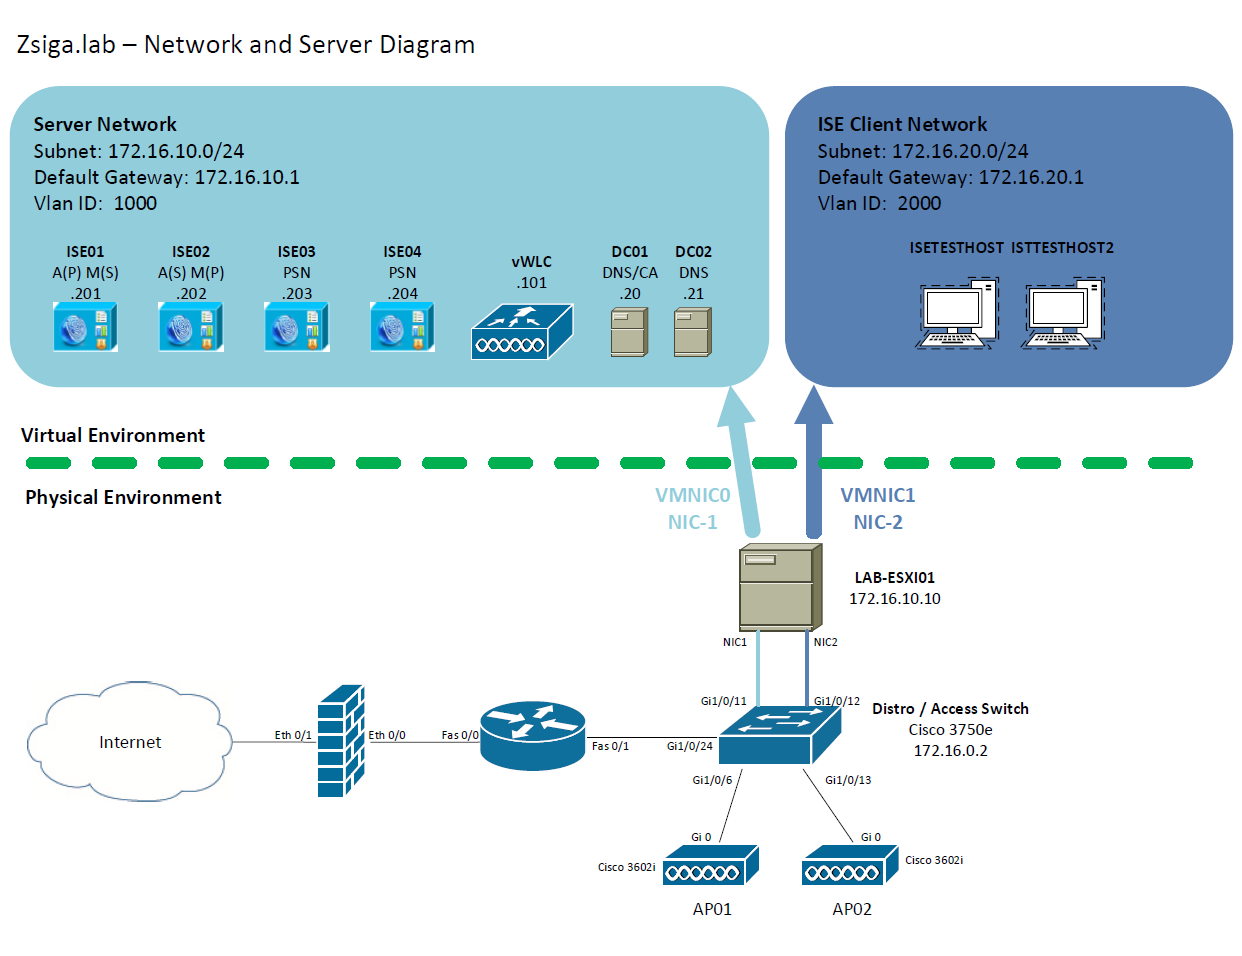
Related Posts:
If you haven’t seen these posts yet, you should check them out- ZBISE01 – Basic Cisco ISE 2.3 VM Installation
- ZBISE02 – Building a Cisco ISE 2.3 Distributed Cluster
- ZBISE03 – Overview of our Cisco ISE 2.3 Use Cases for the ZBISE Blog Series
- ZBISE04 – Cisco ISE 2.3 Adding the ISE Cluster to Active Directory
- ZBISE05 – Virtual Wireless LAN Controller (vWLC) Install
- ZBISE06 – Cisco ISE 2.3 Adding Network Access Devices (NADs) – Cisco Switch
- ZBISE07 – Cisco ISE 2.3 Adding Network Access Devices (NADs) – Cisco vWLC
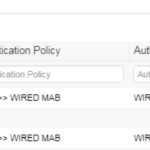
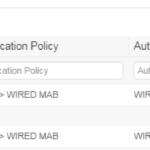
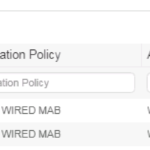
Wired Use Cases
Here is our Wired Use Cases table for reference as we go through the process of creating our Wired Authorization Profiles.
The Steps!!
Before we jump right into explaining the step by step process to complete our mission for today’s blog post, we should go over the mental process that you should be thinking throughout the Use Case implementation. For each Use Case that you will be implementing in your environment, there should be two logical steps in your mind. Step 1 is Authentication and Step 2 is Authorization. These two steps are sometimes referred to as AuthC and AuthZ respectively. While this specific installment is going to cover the second step of this process, the Authorization, the first Step, Authentication, always happens first. If you run into any issues, I recommend removing any specific Authorization configuration from your Use Cases (Just use Permit Access), and fully verify Authentication is properly working first. This means making sure not only are devices / users authenticating, but that they are using the proper authentication mechanism (EAP, PEAP, MAB, WebAuth, etc…). Here is a list of the Authorization Profiles we will be creating in today’s installment.- WIRED-BLACKLIST
- WIRED-WHITELIST
- WIRED-DOMAIN-PC
- WIRED-PRIV-USER
- WIRED-DOMAIN-USER
- WIRED-VOIP-PHONE
- WIRED-ACCESS-POINT
- WIRED-XBOX
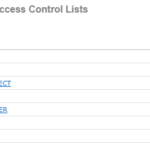
1. Create the necessary Downloadable ACLs (dACLs)
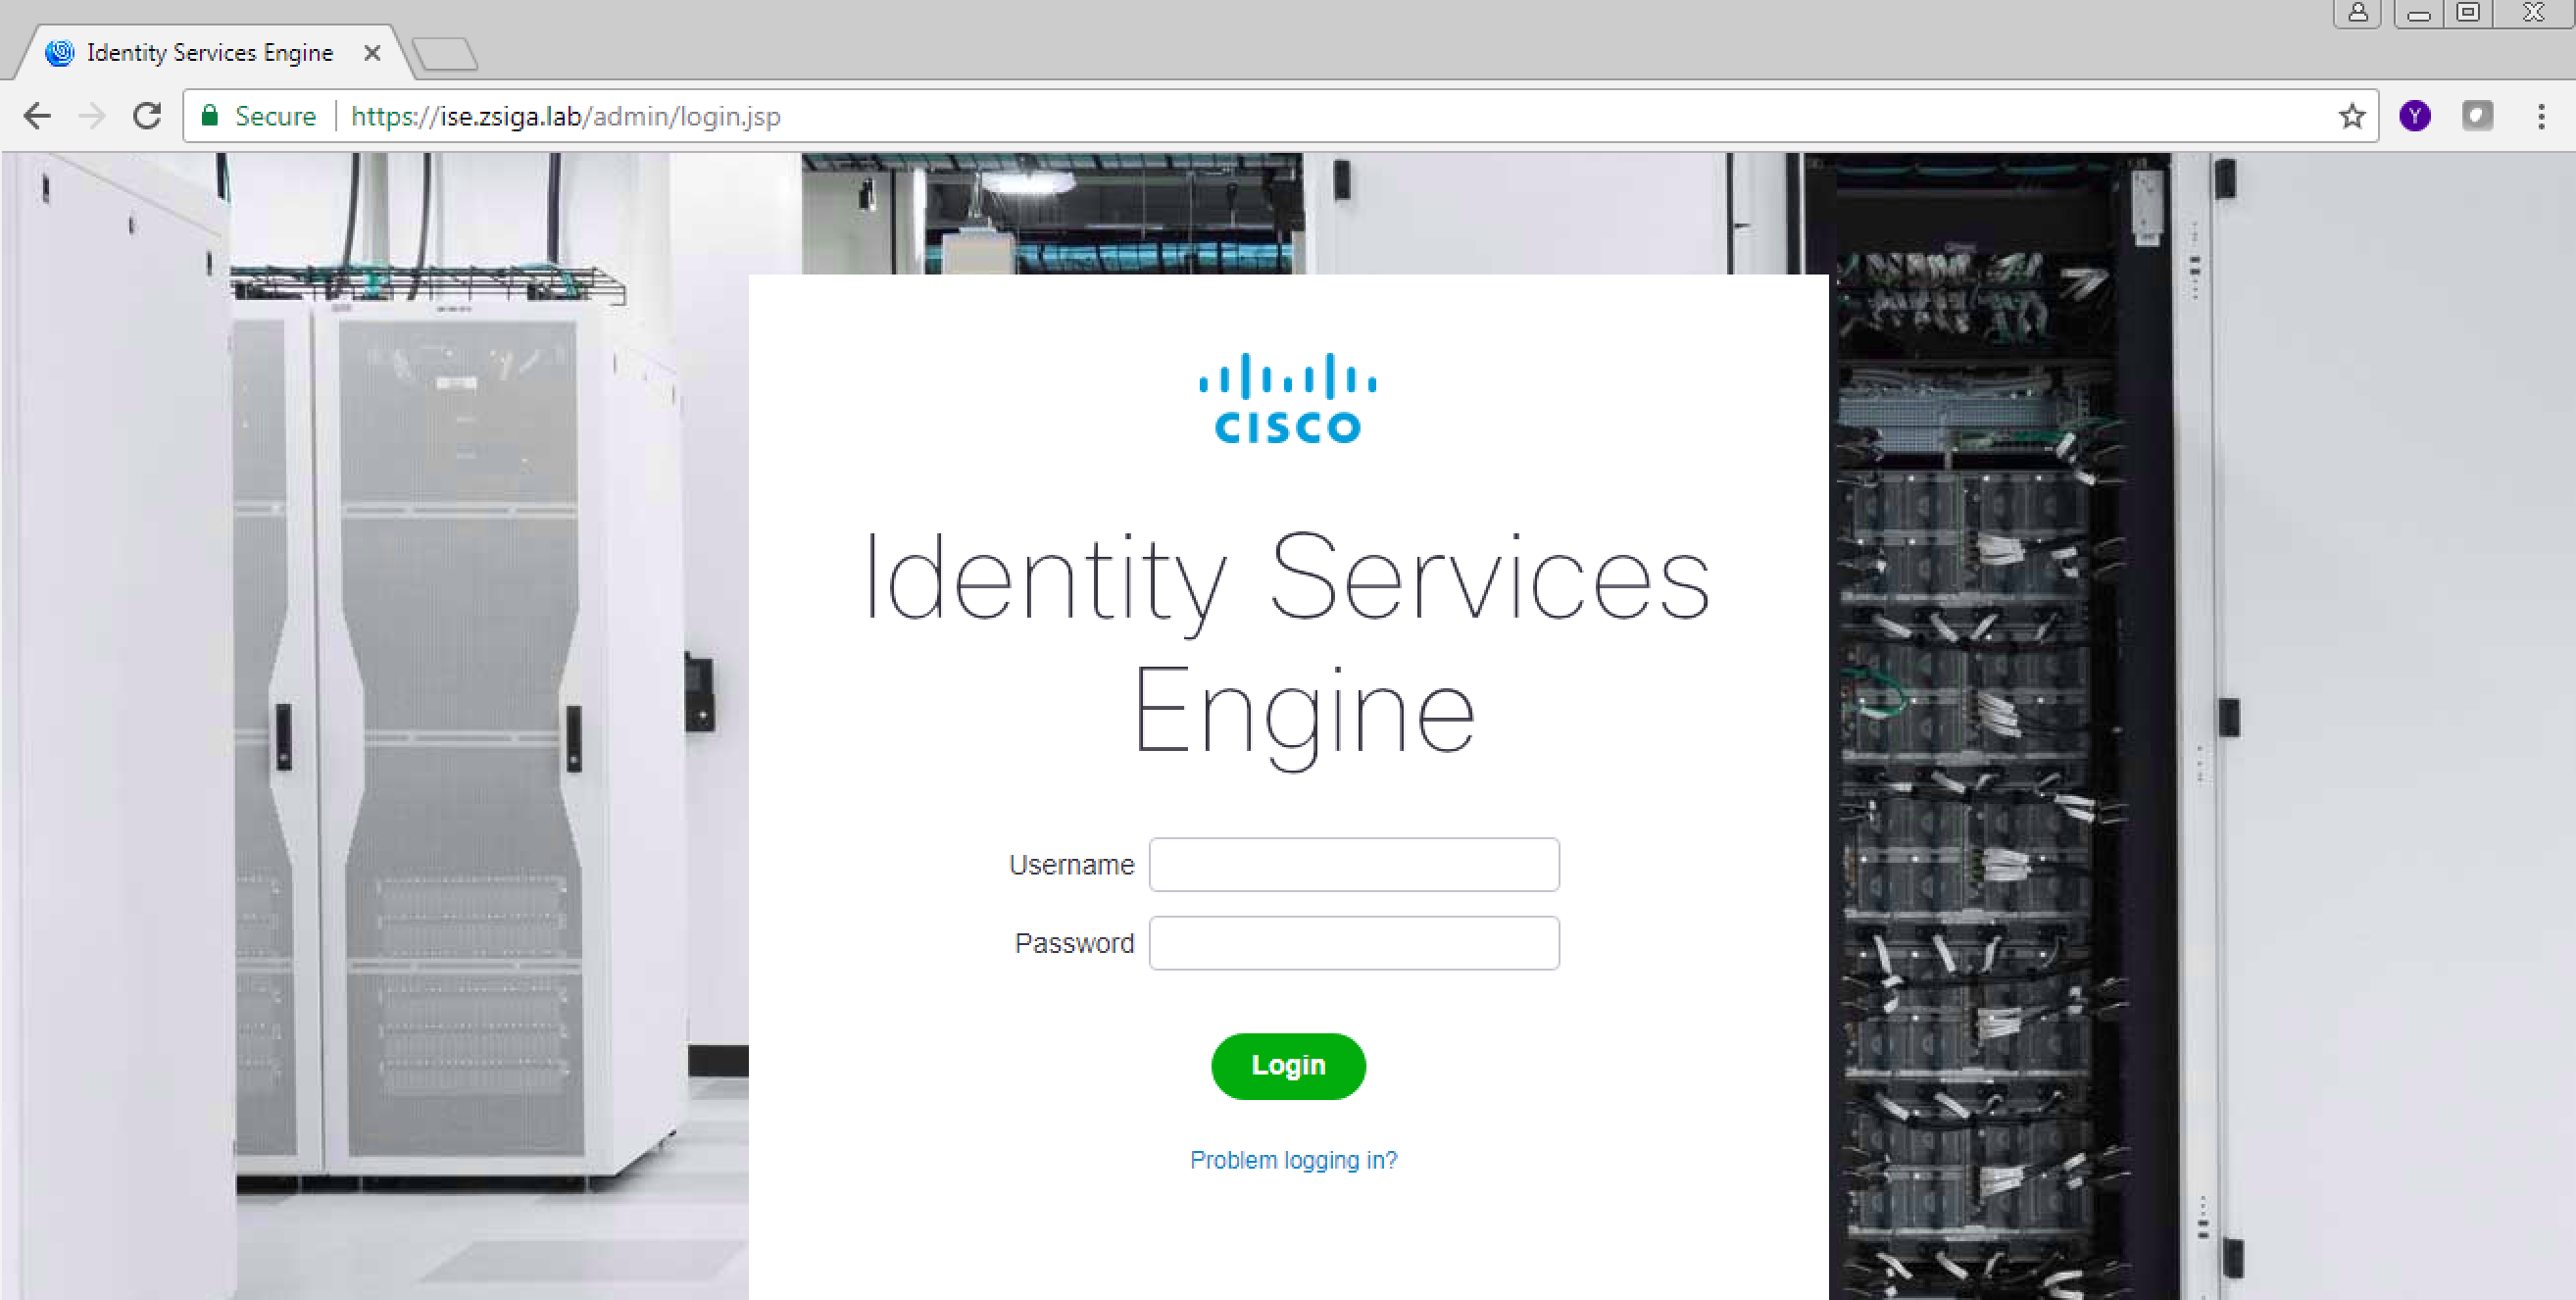
To start this process off, we need to login to our ISE Cluster. If you have been following along, you should be able to access your Primary Admin node via https://ISE.FQDN, in our case its https://ISE.ZSIGA.LAB. Once the login page displays, you guessed it, login with your Admin credentials.
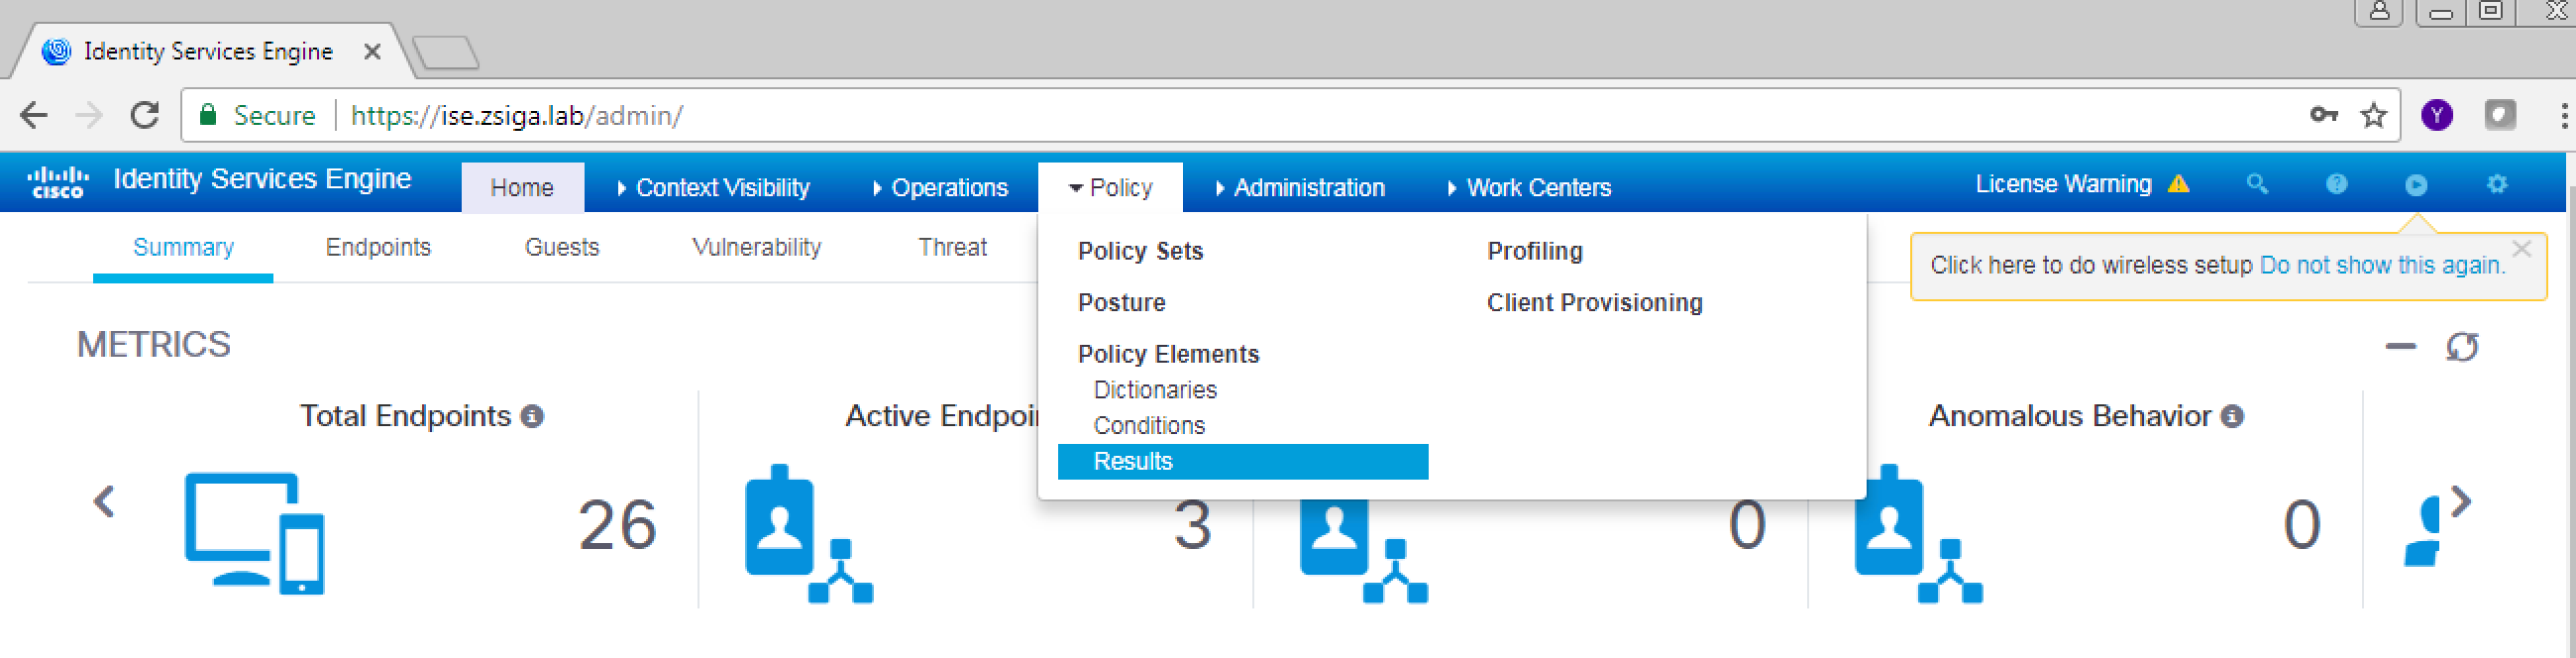
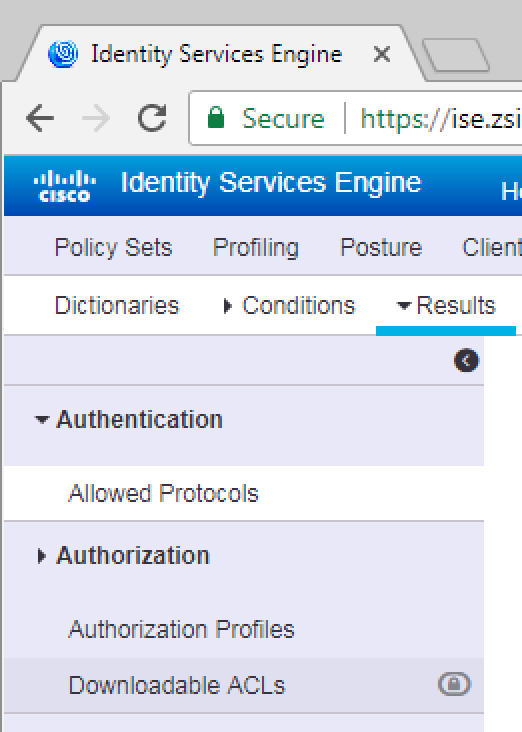
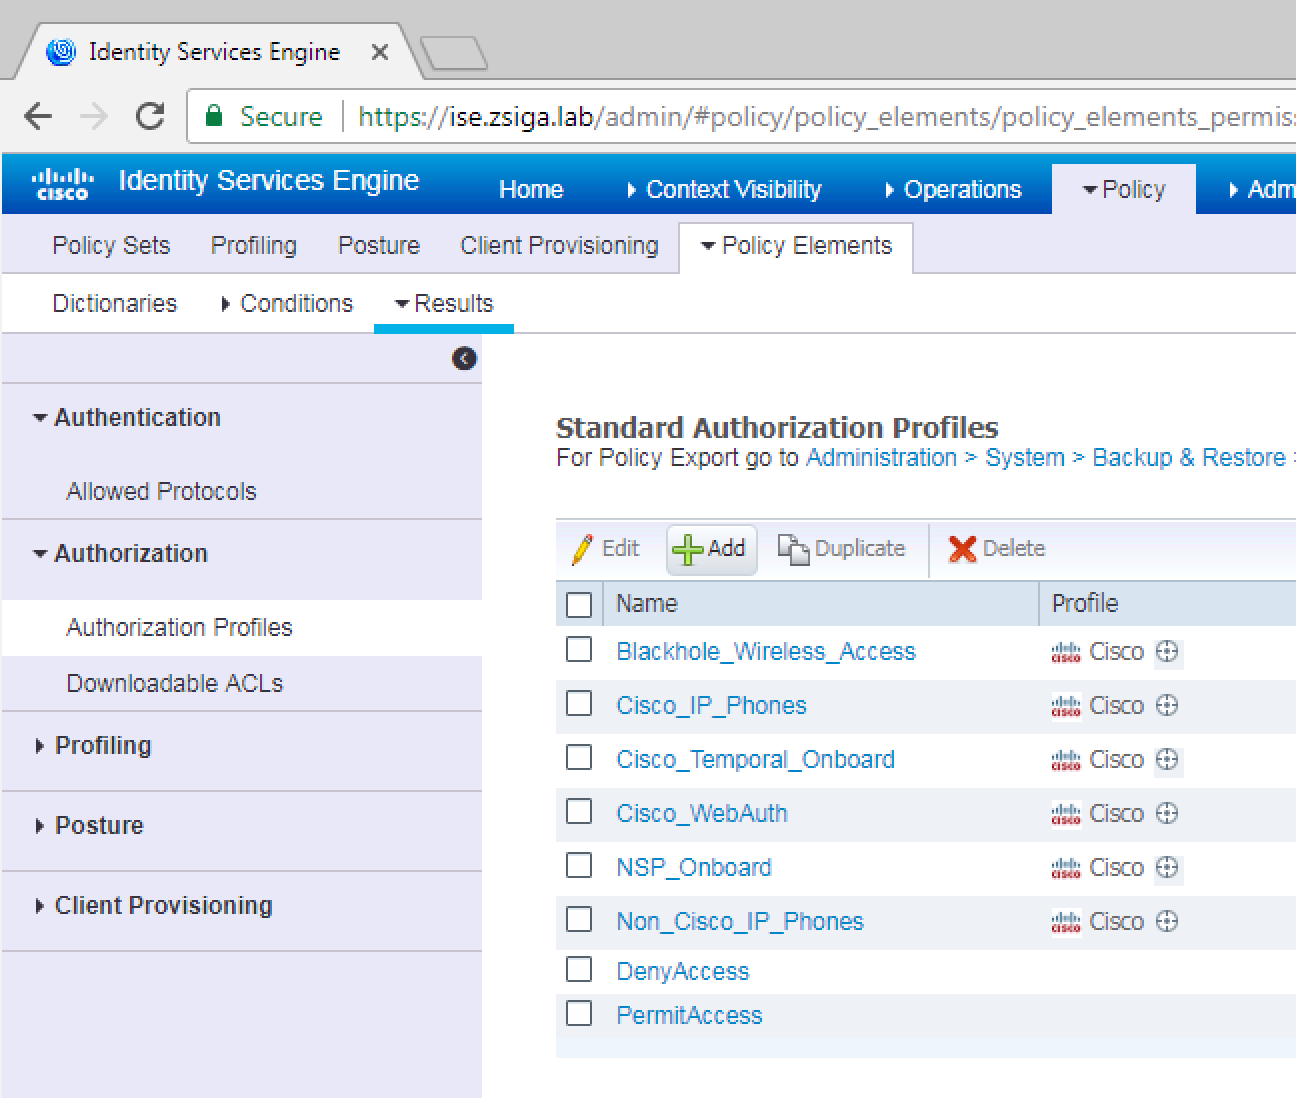
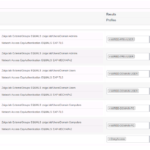
Now that we are logged into our ISE Cluster, we are going to navigate to Policy -> Policy Elements -> Results.
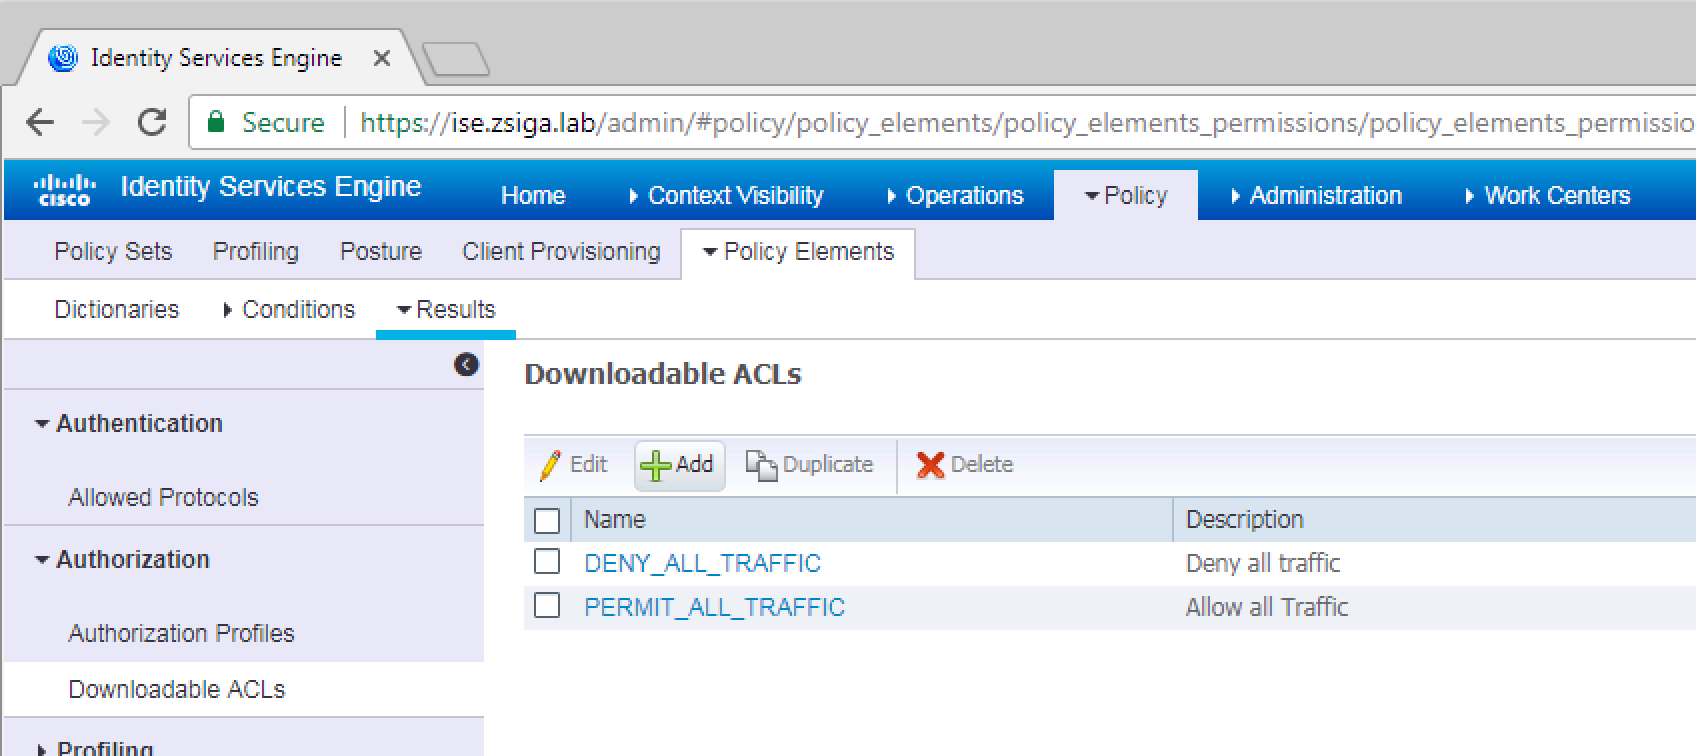
You most likely will be spending a lot of time in these windows, so look around, explore and get used to them. Once you are done exploring, on the Left pane, select Downloadable ACLs under the Authorization Sub menu.
On the Download ACLs screen, you will see any pre-defined dACLs that come with the version of ISE you are running with. Lets go a head and create our own by selecting the Add button as shown in the below screenshot.
For the most part, you can use the exact same syntax that is used on your switches. For example, I have used different wildcard masks to match deployment specific information. For example, lets say your environment has all printers on the following subnet *.*.10.*, you can use a wildcard mask to match that in your deployment. This is just to give you an example of what you can do if needed.
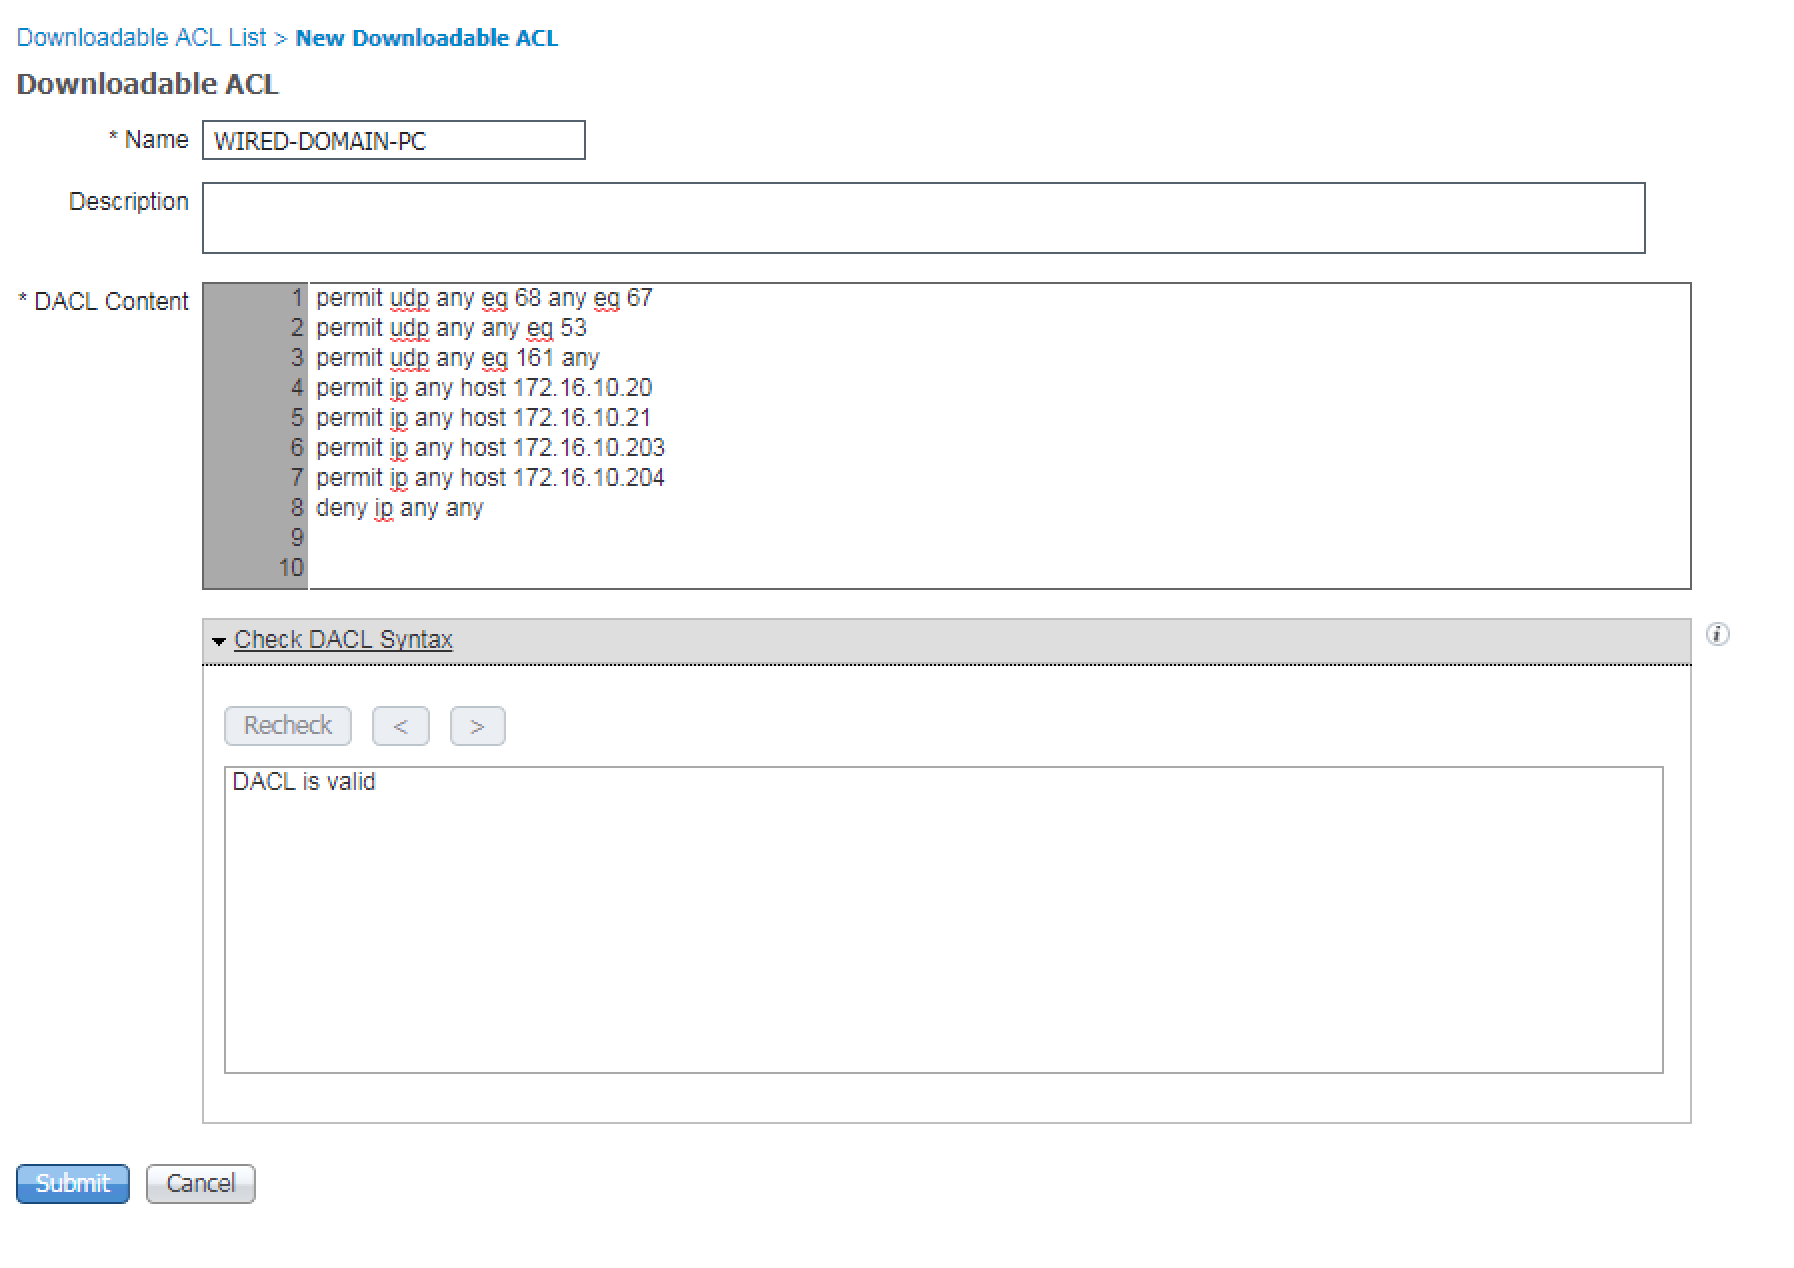
The first dACL we are creating is for our our Wired Domain Computer ACL. Be very careful with a dACL that restricts what a computer can do. Make sure you walk through this with your deployment team because if you miss that critical share drive, or domain controller, you can break the ability to login to the computer, or have a very degraded performance. I’ve been a part of a deployment that didn’t have all of the share drives in the ACL which caused a user’s login time to take 5-plus minutes. For our deployment we are going to include the following in our Domain PC ACL: Any DHCP, Any DNS, Any SNMP, Domain Controllers (172.16.10.20 and 172.16.10.21), and ISE Policy Nodes (172.16.10.203 and 172.16.10.204). After all of those items have been include, we are going to add a Deny IP Any Any.
The below screenshot shows this ACL, WIRED-DOMAIN-PC, in our Lab environment.
Once you have your dACL syntax entered, you can select the Check dACL syntax to validate it is accurate. Once validated, click the Submit button to complete the creation of this dACL.
We are going to create a few more dACLs so we will be following the same process a number of times.
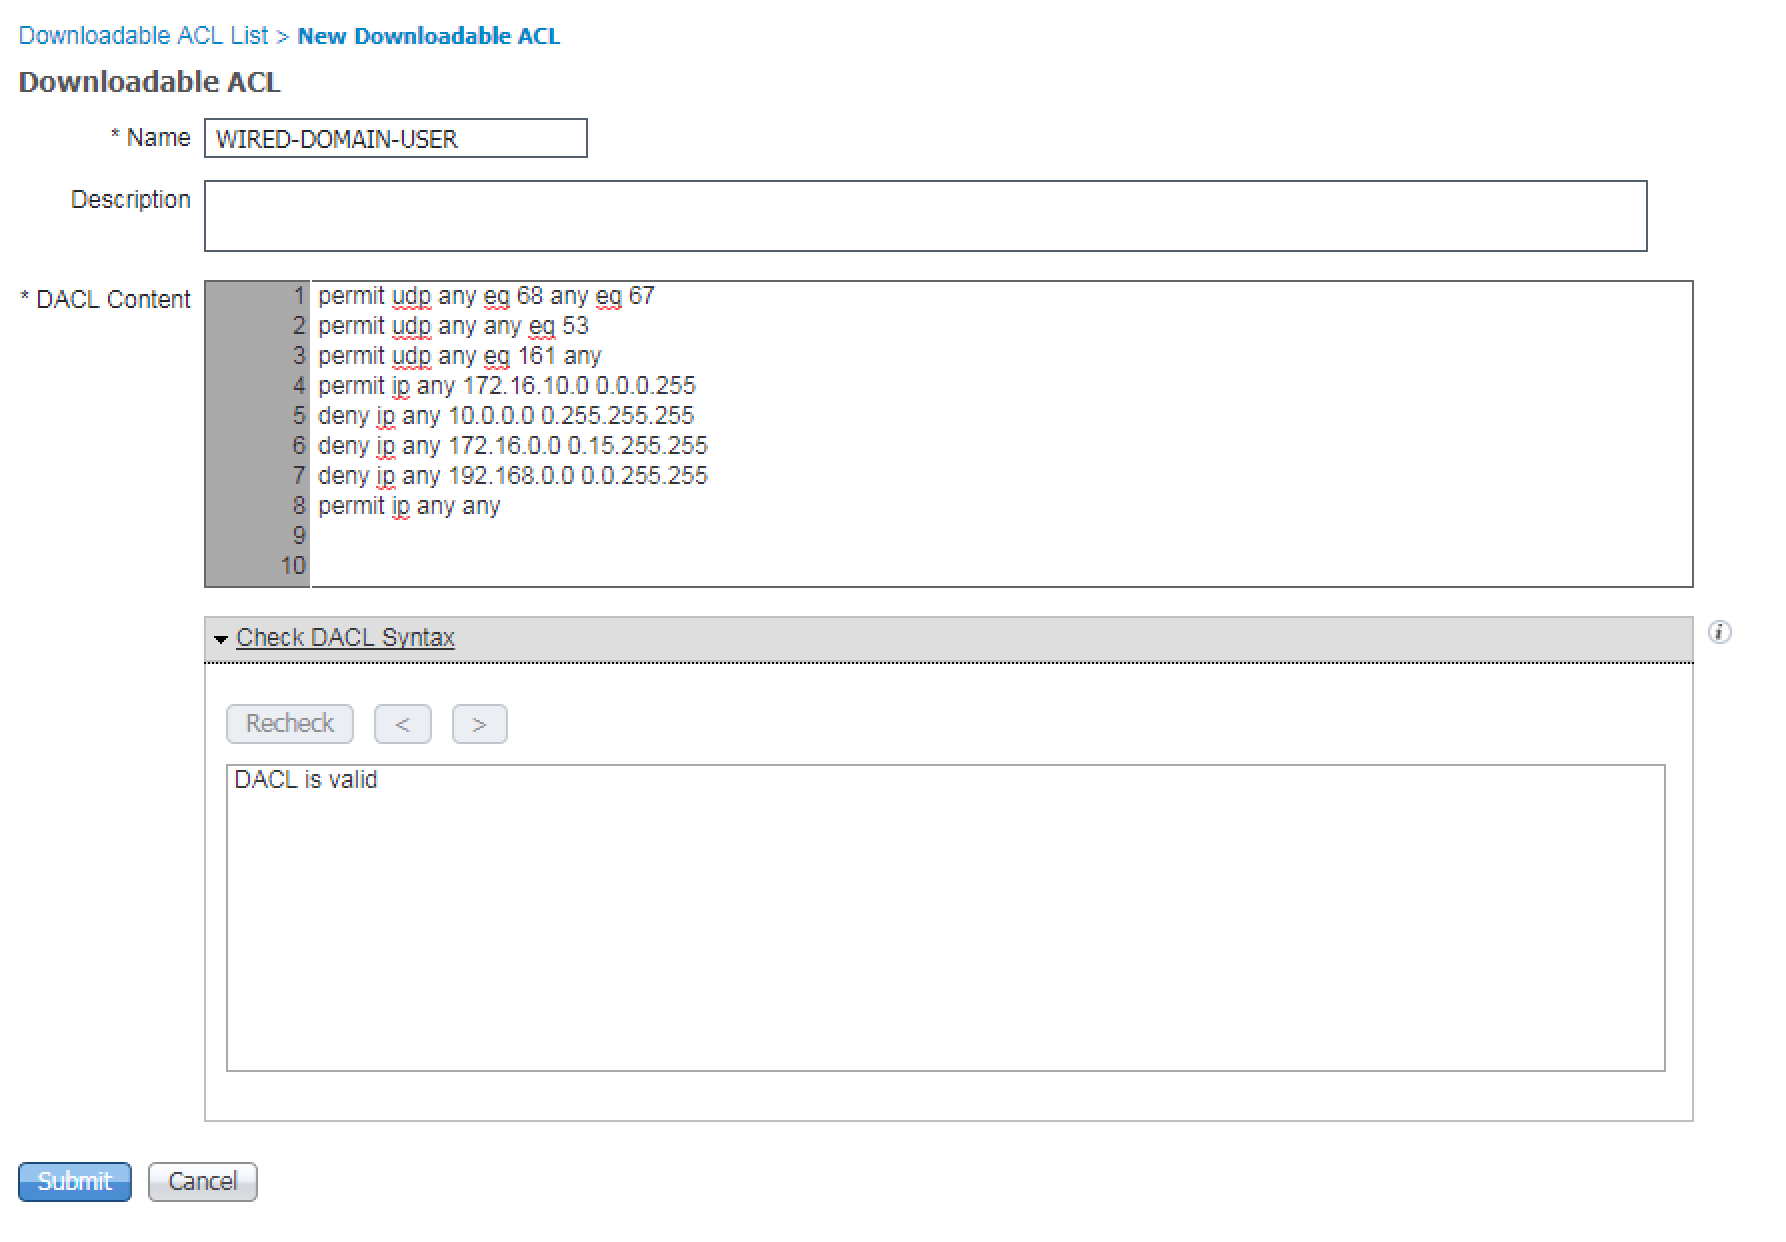
The next dACL is called WIRED-DOMAIN-USER. For this dACL, we are going to permit DHCP, DNS, and SNMP, which is usually a standard of all of our dACLs / ACLs. Then we are going to allow regular users full access to our Server Subnet, 172.16.10.0/24, but nothing else internally. After the Server subnet, we are going to deny each RFC1918 range (10.0.0.0/8, 172.16.0.0/12, & 192.168.0.0/16) to restrict the rest of the internal resources. With the internal private ranges restricted we now can add a Permit IP Any Any to allow internet access. When we go through our testing and validation of our Use cases we will attempt to access one of the other internal subnets.
Below is a screenshot of the WIRED-DOMAIN-USER dACL.
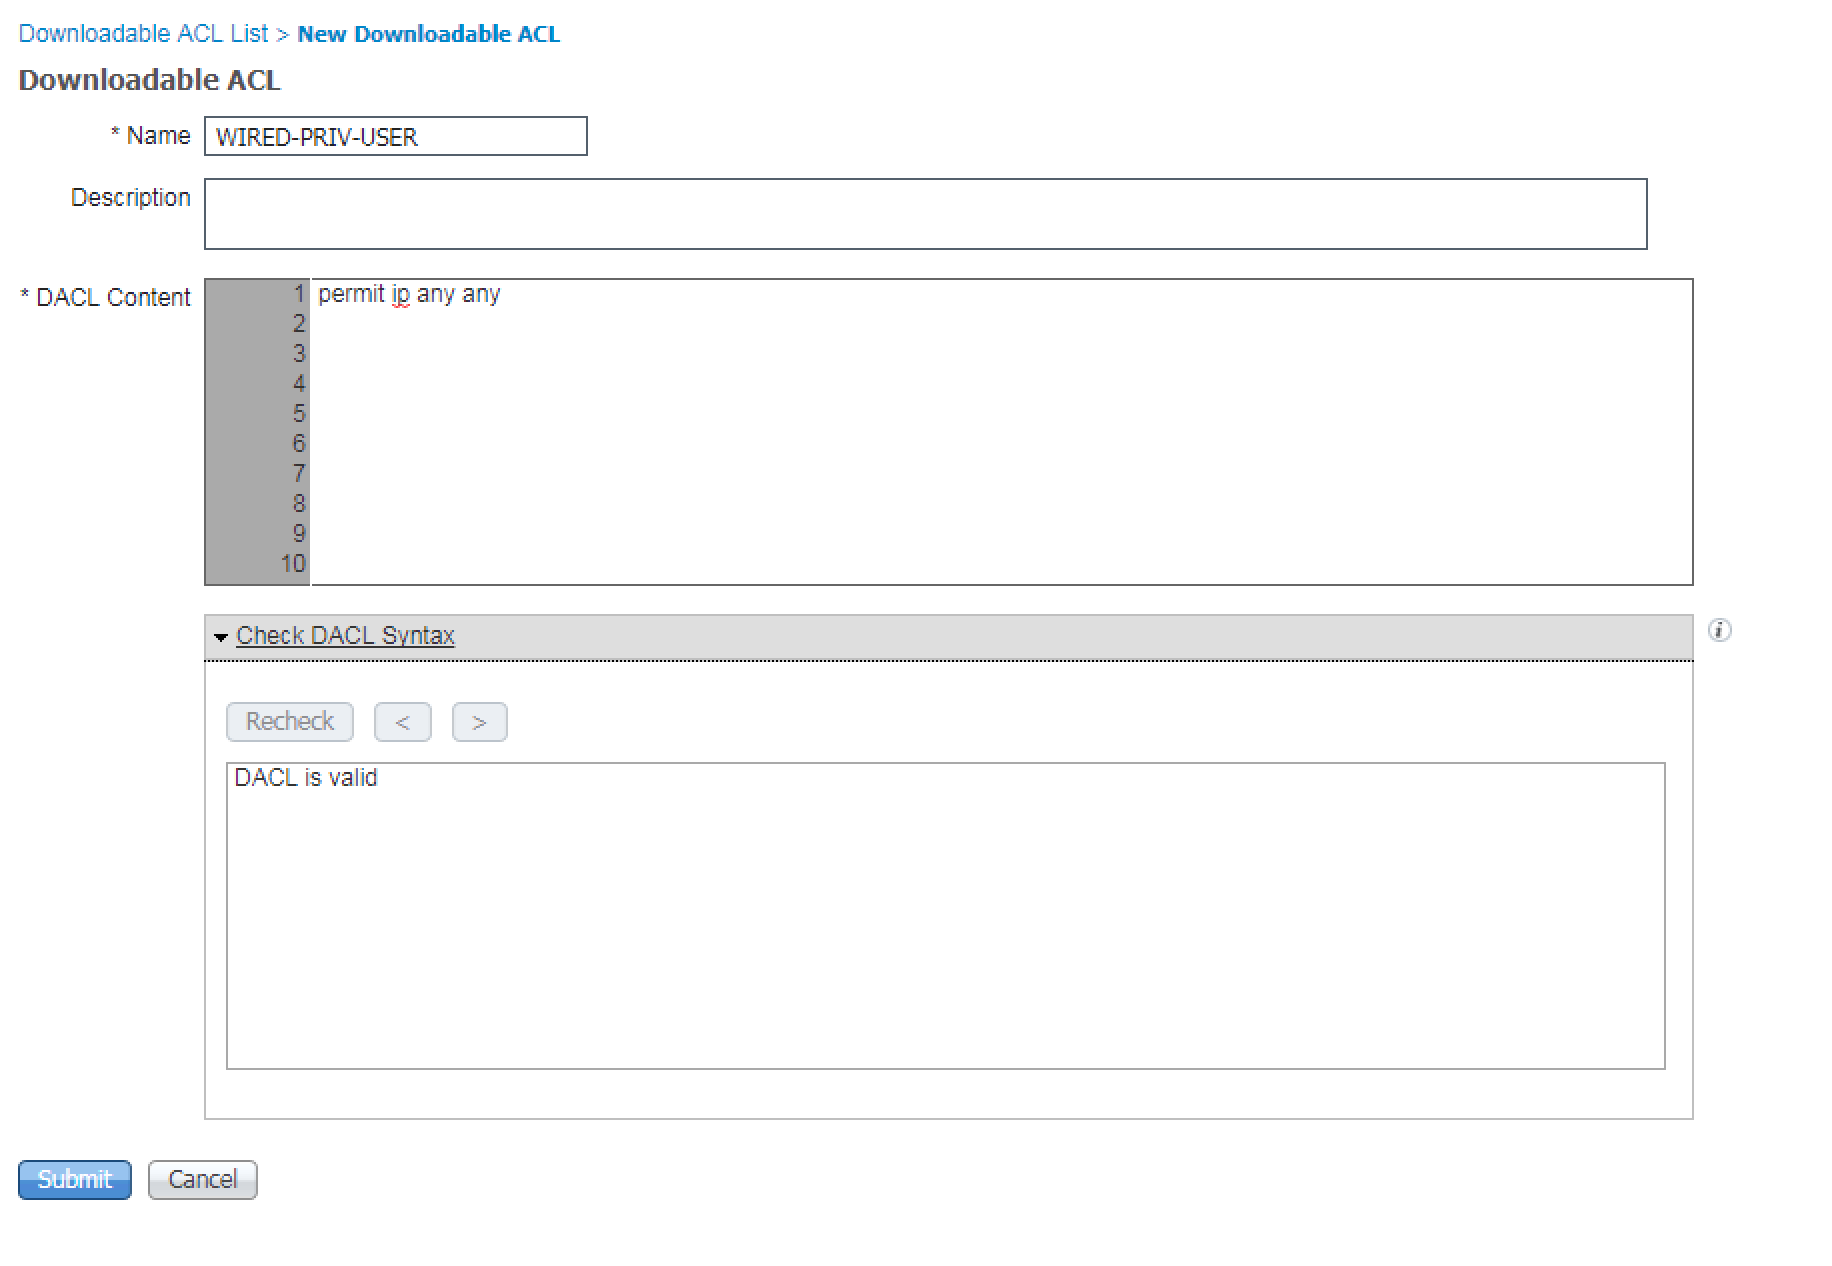
Our next dACL is pretty easy. Its called the WIRED-PRIV-USER dACL and is going to allow everything. I traditionally do not like to use the built-in objects within ISE. I like to leave them alone and create my own. For this one you could easily use the PermitAccess Authorization Profile or you could use custom Authorization Profile that calls the built-in Permit All dACL. One of the main reasons why I like to create my own objects, is because I can name them a more initiative name which allows me to track the authentication attempts per Use Case. If I were to use the PermitAccess Authorization profile for every Use Case, I would never know which use case a specific session was hitting without further digging into the logs.
Below is a screenshot of the WIRED-PRIV-USER dACL that is just permitting IP any any.
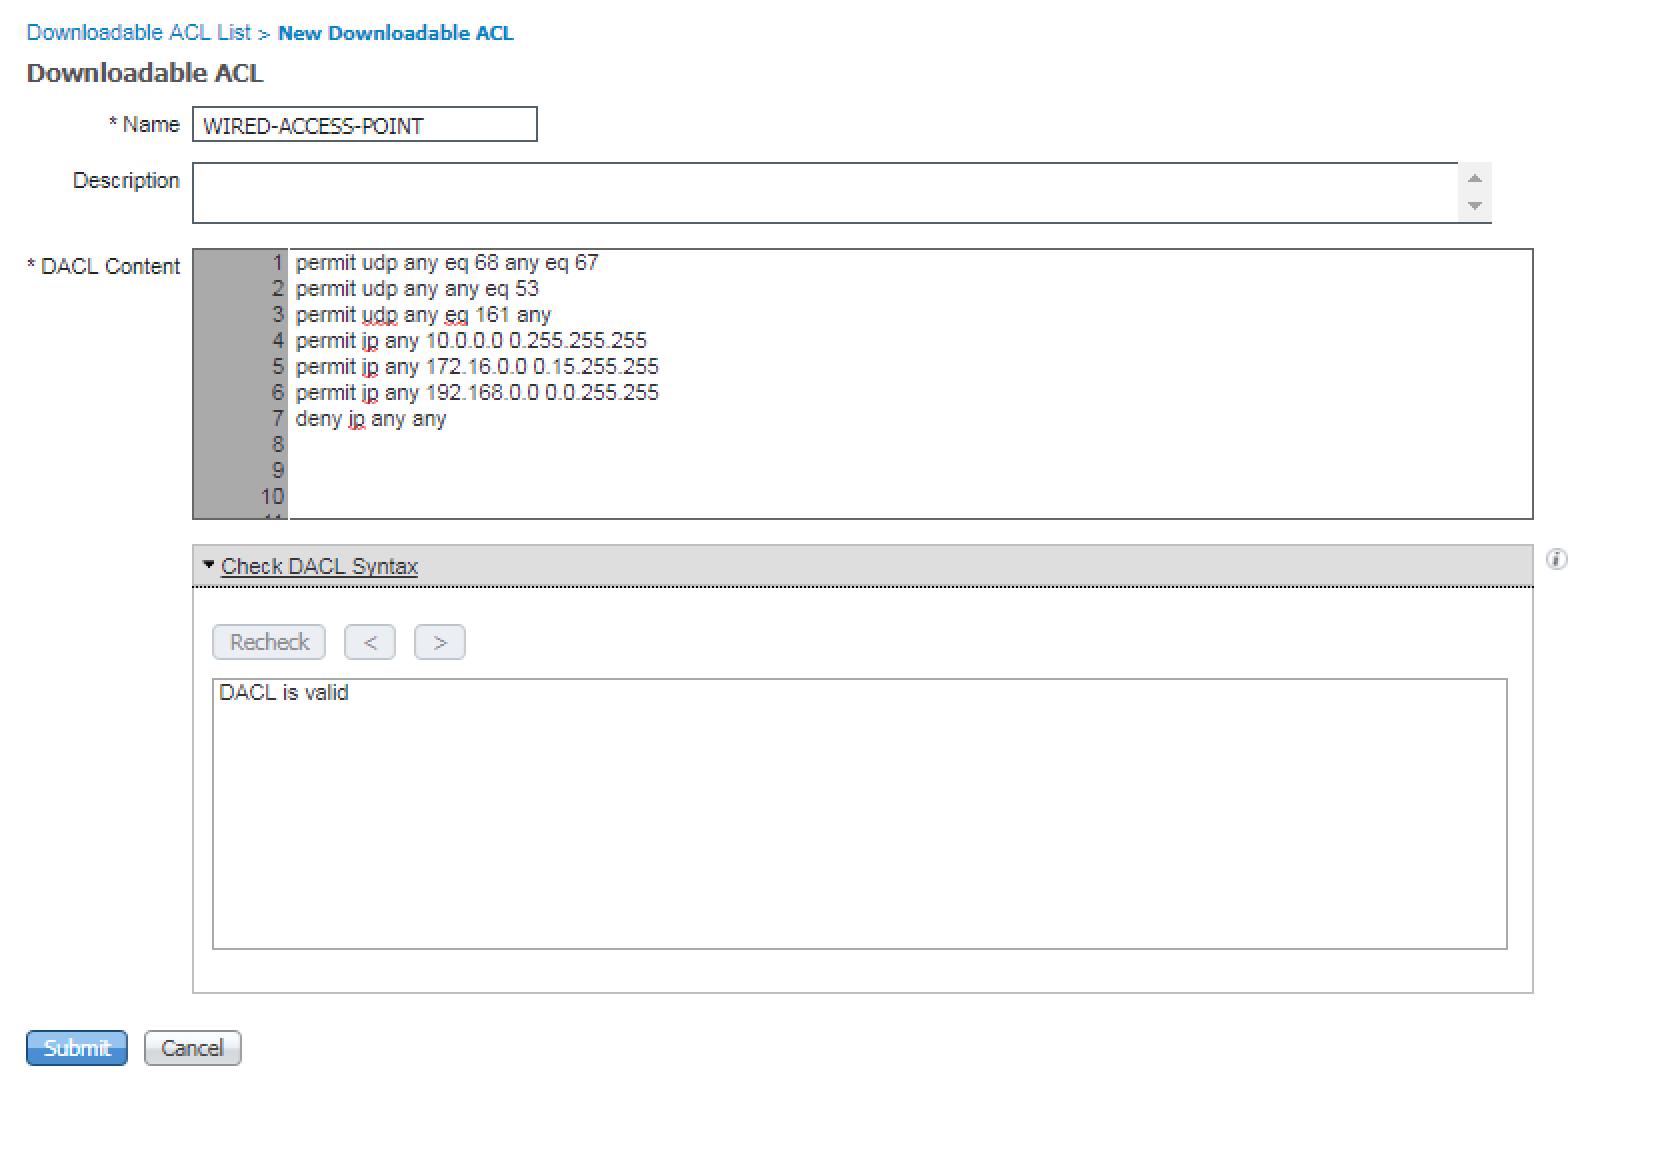
Below is our WIRED-ACCESS-POINT dACL. For this dACL we are allowing DHCP, DNS, SNMP, and all internal subnet ranges (RFC1918), then we are denying everything else (Internet Traffic). Our Access Points have no reason to be hitting the Internet.
Below is a screenshot of the WIRED-ACCESS-POINT dACL.
Our last dACL is our WIRED-XBOX dACL. For this dACL we are allowing DHCP, DNS, and SNMP, just like all of the rest of our dACLs ;). Then we are going to allow our two ISE PSNs, 172.16.10.203 and 172.16.10.204. Thats all we need internally, so we are going to deny the rest of RFC1918 (10.0.0.0/8, 172.16.0.0/12, & 192.168.0.0/16). Finally, we are going to allow all internet related traffic through.
Below is a screenshot of our WIRED-XBOX dACL.

2. Create our Wired Authorization Profiles
Here is where we are actually going to map the different “permissions” within a policy for our Use Cases. Here the permissions can be dACLs, VLAN Overrides, Voice Domain Access, etc… There are a great number of different permissions that you can apply to an authenticated session and we are not going to go over everyone of them. We are going to use the top used permissions for most ISE Deployments.
To start this process, we need to navigate to Policy -> Policy Elements -> Results, and then on the left pane select Authorization Profiles under the Authorization Submenu. Once on this page, clikc the Add button to create a new Authorization Profile.
We are going to be repeating this process for each Authorization Profile.
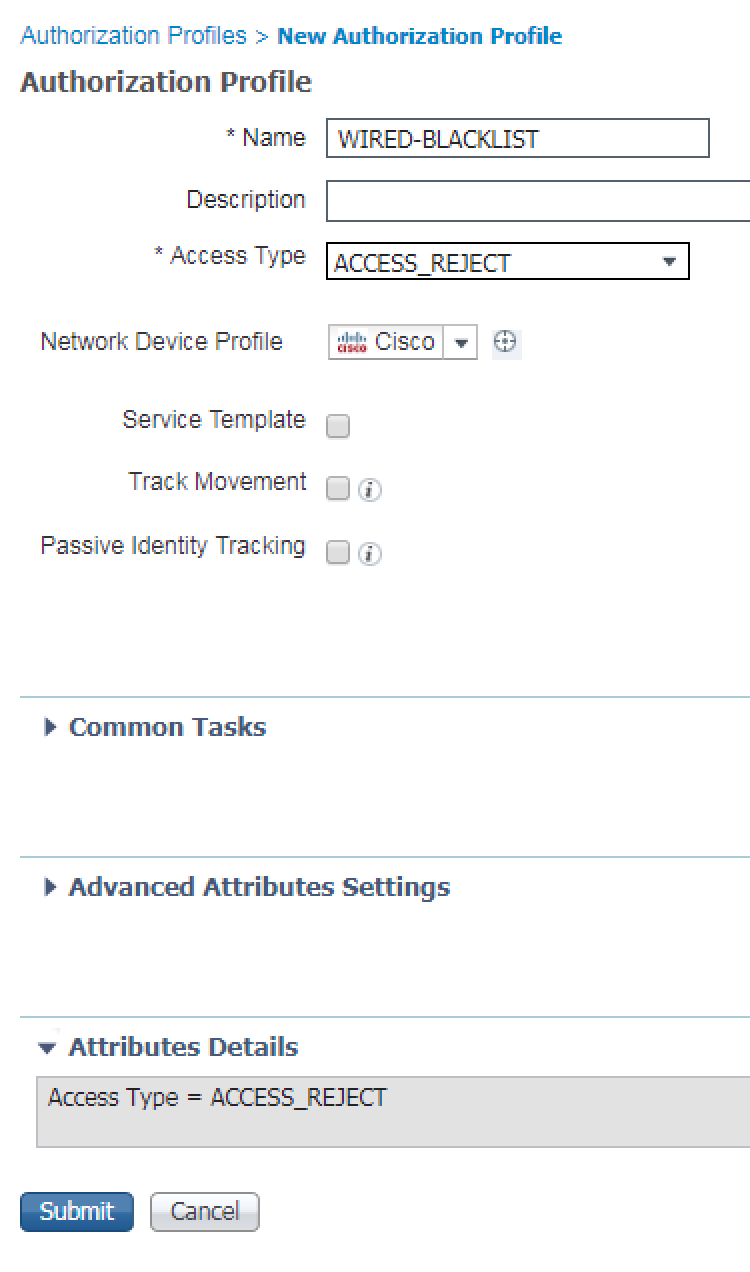
The first Authorization Profile is going to be WIRED-BLACKLIST. For this Authorization Profile we are going to select the ACCESS_REJECT Access Type. This will be the only Authorization Profile that we will be doing this for. For this Authorization Profile this is all we are doing.
Here is a screenshot of our WIRED-BLACKLIST Authorization Profile.
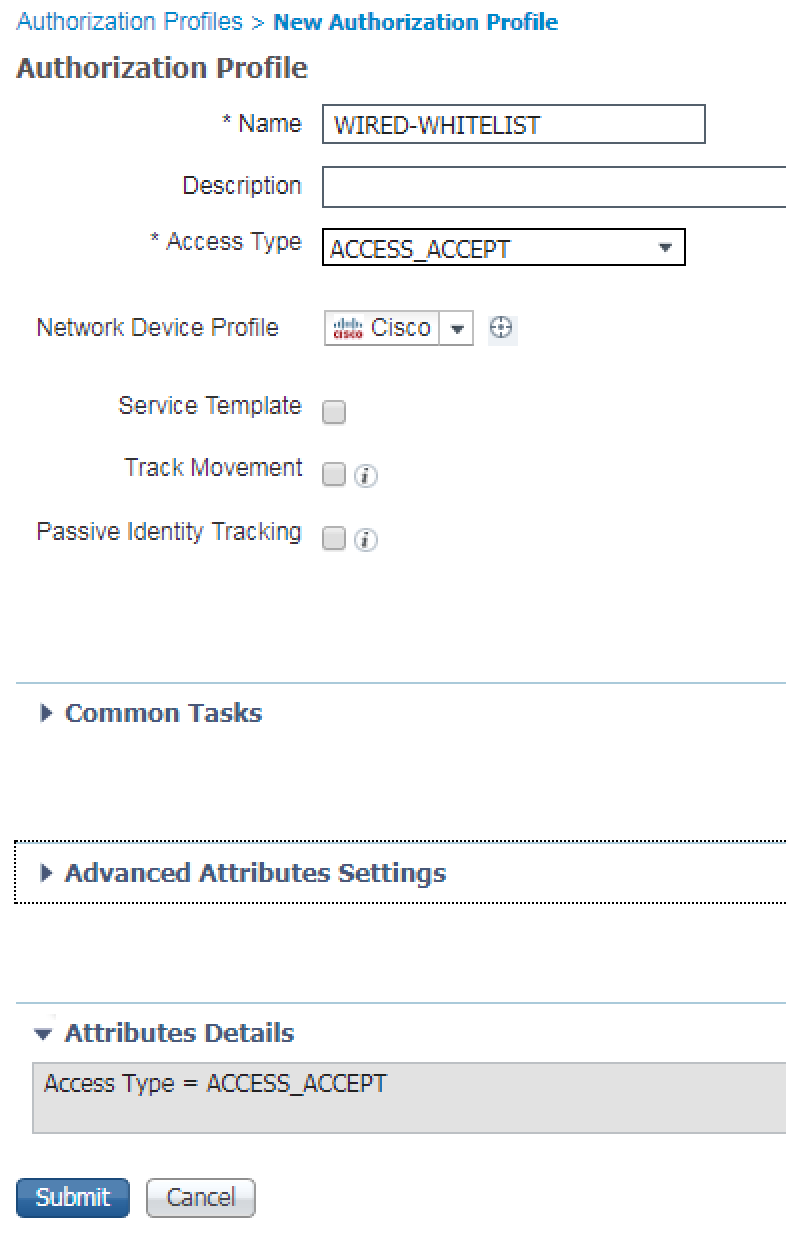
The WIRED-WHITELIST Authorization Profile is the next one we are going to work on. For this Authorization Profile we are going to select ACCESS-ACCEPT for the Access Type and thats it. For our deployment, this will allow full access without any other intervention.
The WIRED-WHITELIST Authorization Profile screenshot is below.
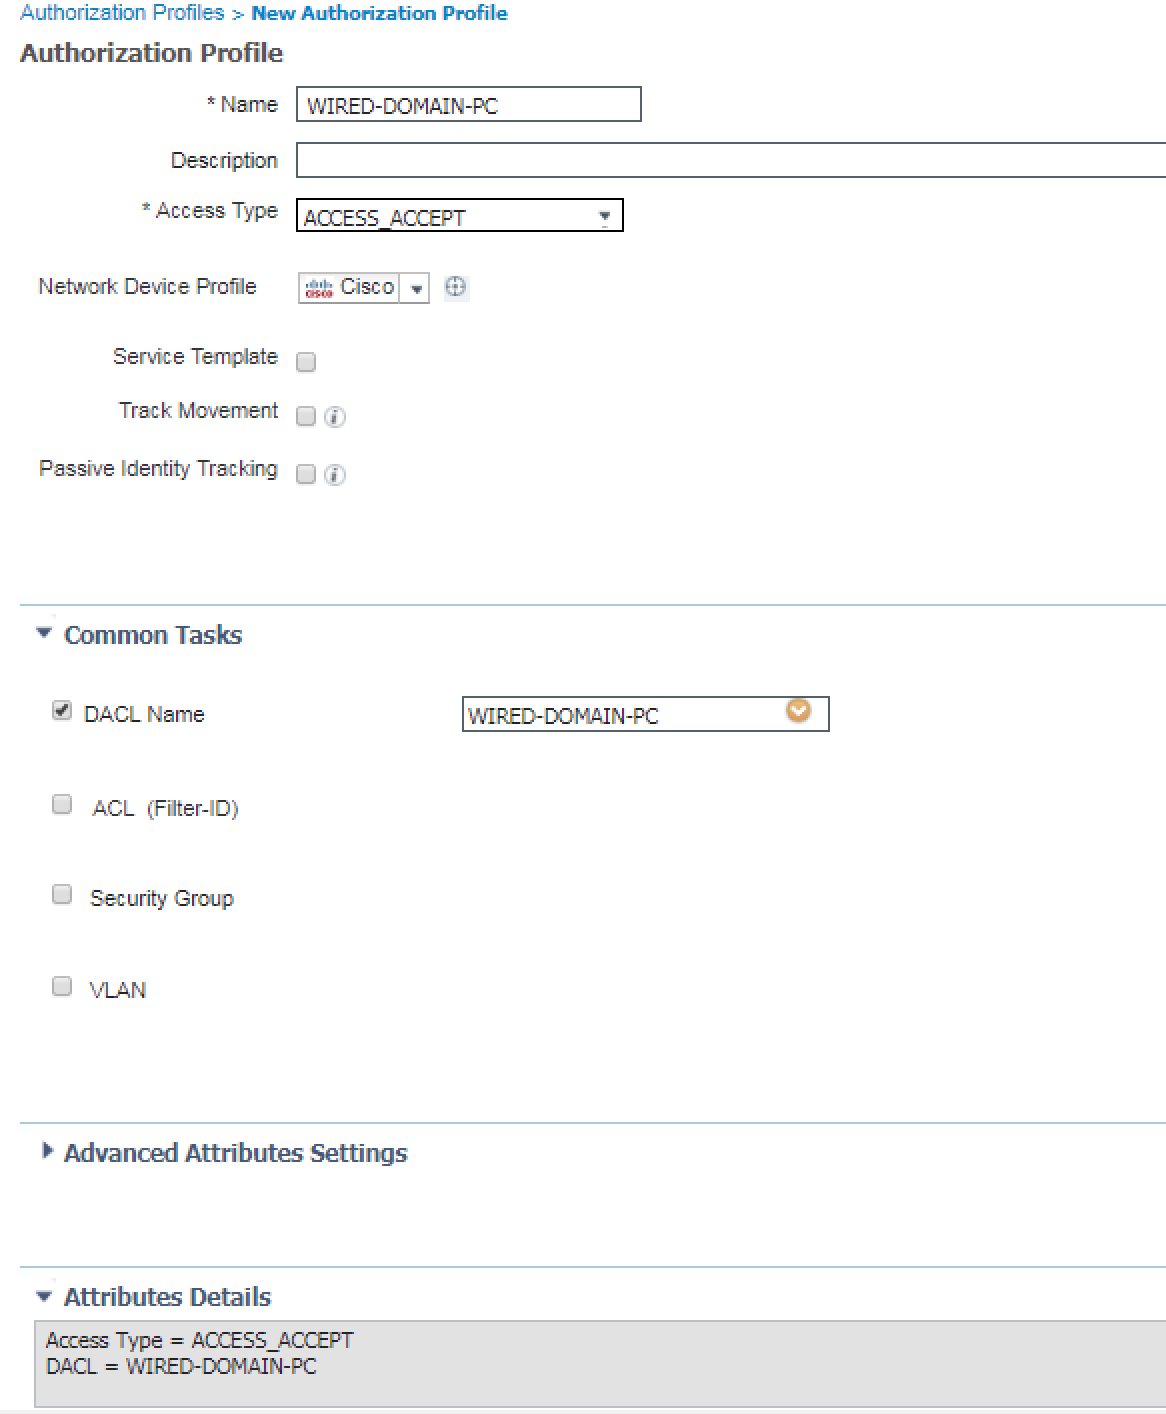
Below is the screenshot of the WIRED-DOMAIN-PC Authorization Profile. For this Authorization Profile, we are using ACCESS_ACCEPT and are selecting the DACL we created in Step 1 called WIRED-DOMAIN-PC. Thats it for this Authorization Profile.
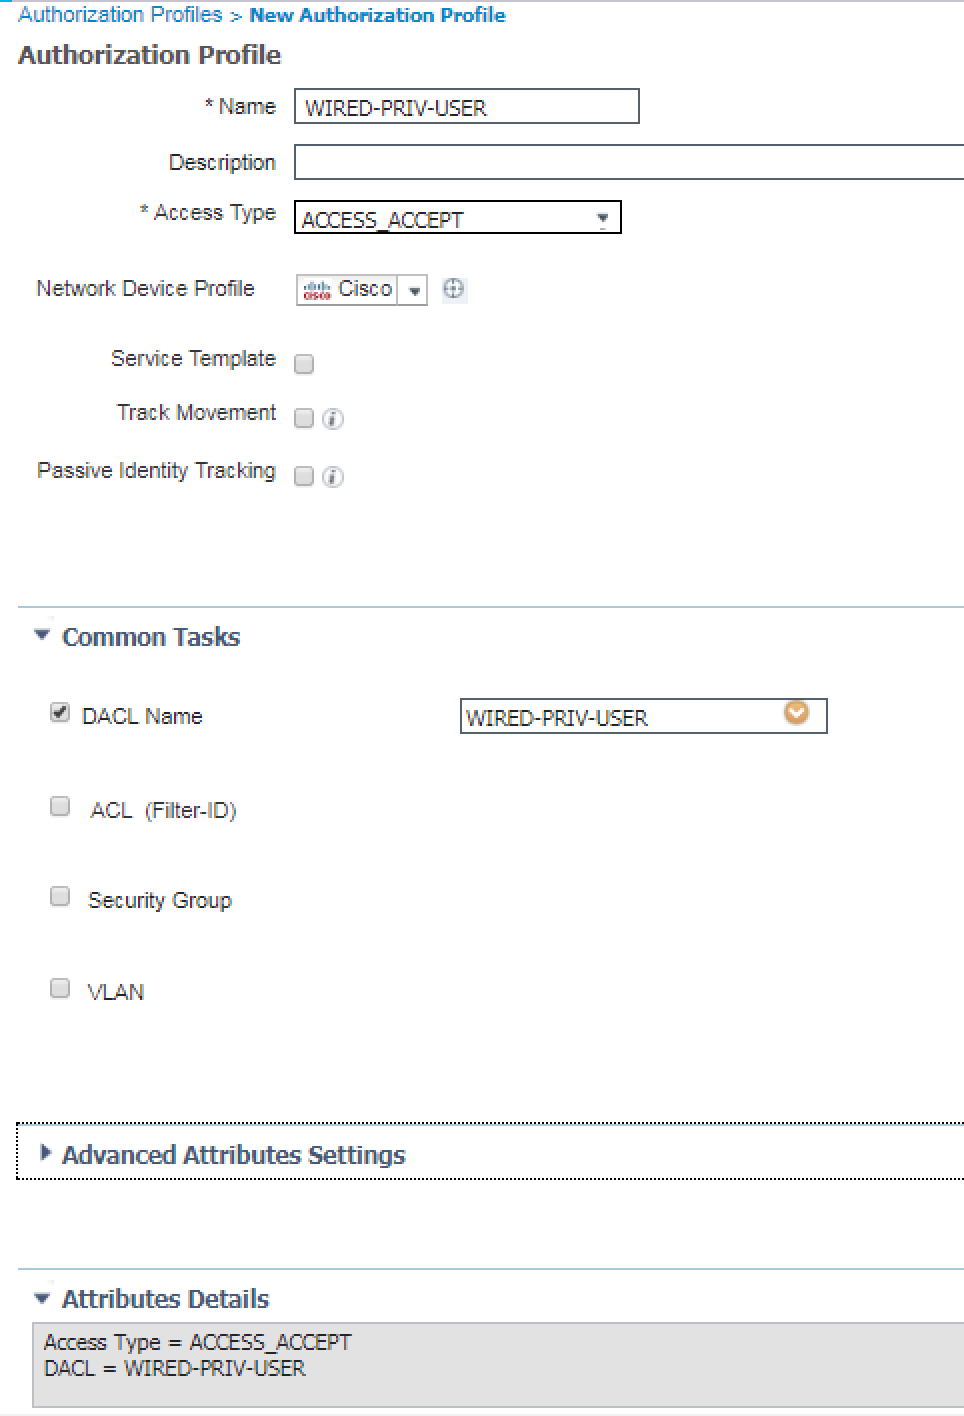
Similar to the WIRED-DOMAIN-PC Authorization Profile, the WIRED-PRIV-USER also uses ACCESS_ACCEPT and calls its corresponding DACL called WIRED-PRIV-USER. The WIRED-PRIVE-USER Authorization Profile is shown below.
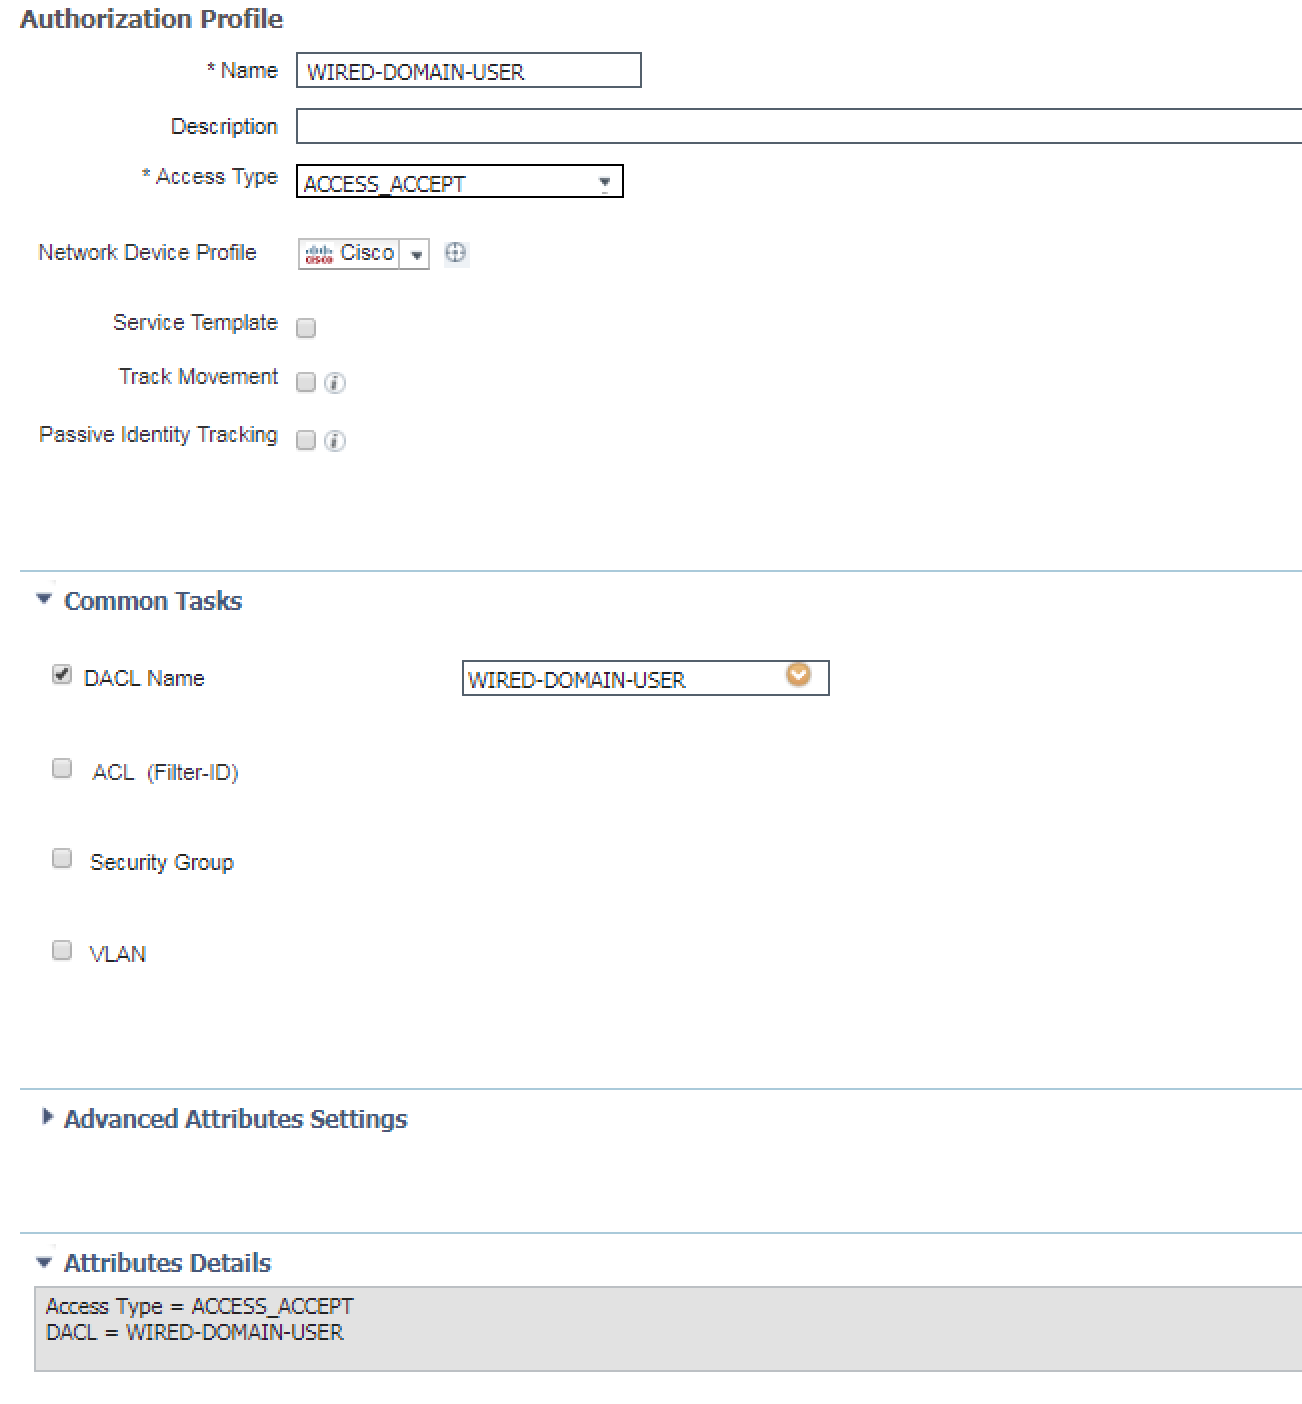
Still doing the same configurations here as the last two. This is the WIRED-DOMAIN-USER Authorization Profile that is using ACCESS_ACCEPT and calling its associated DACL called WIRED-DOMAIN-USER.
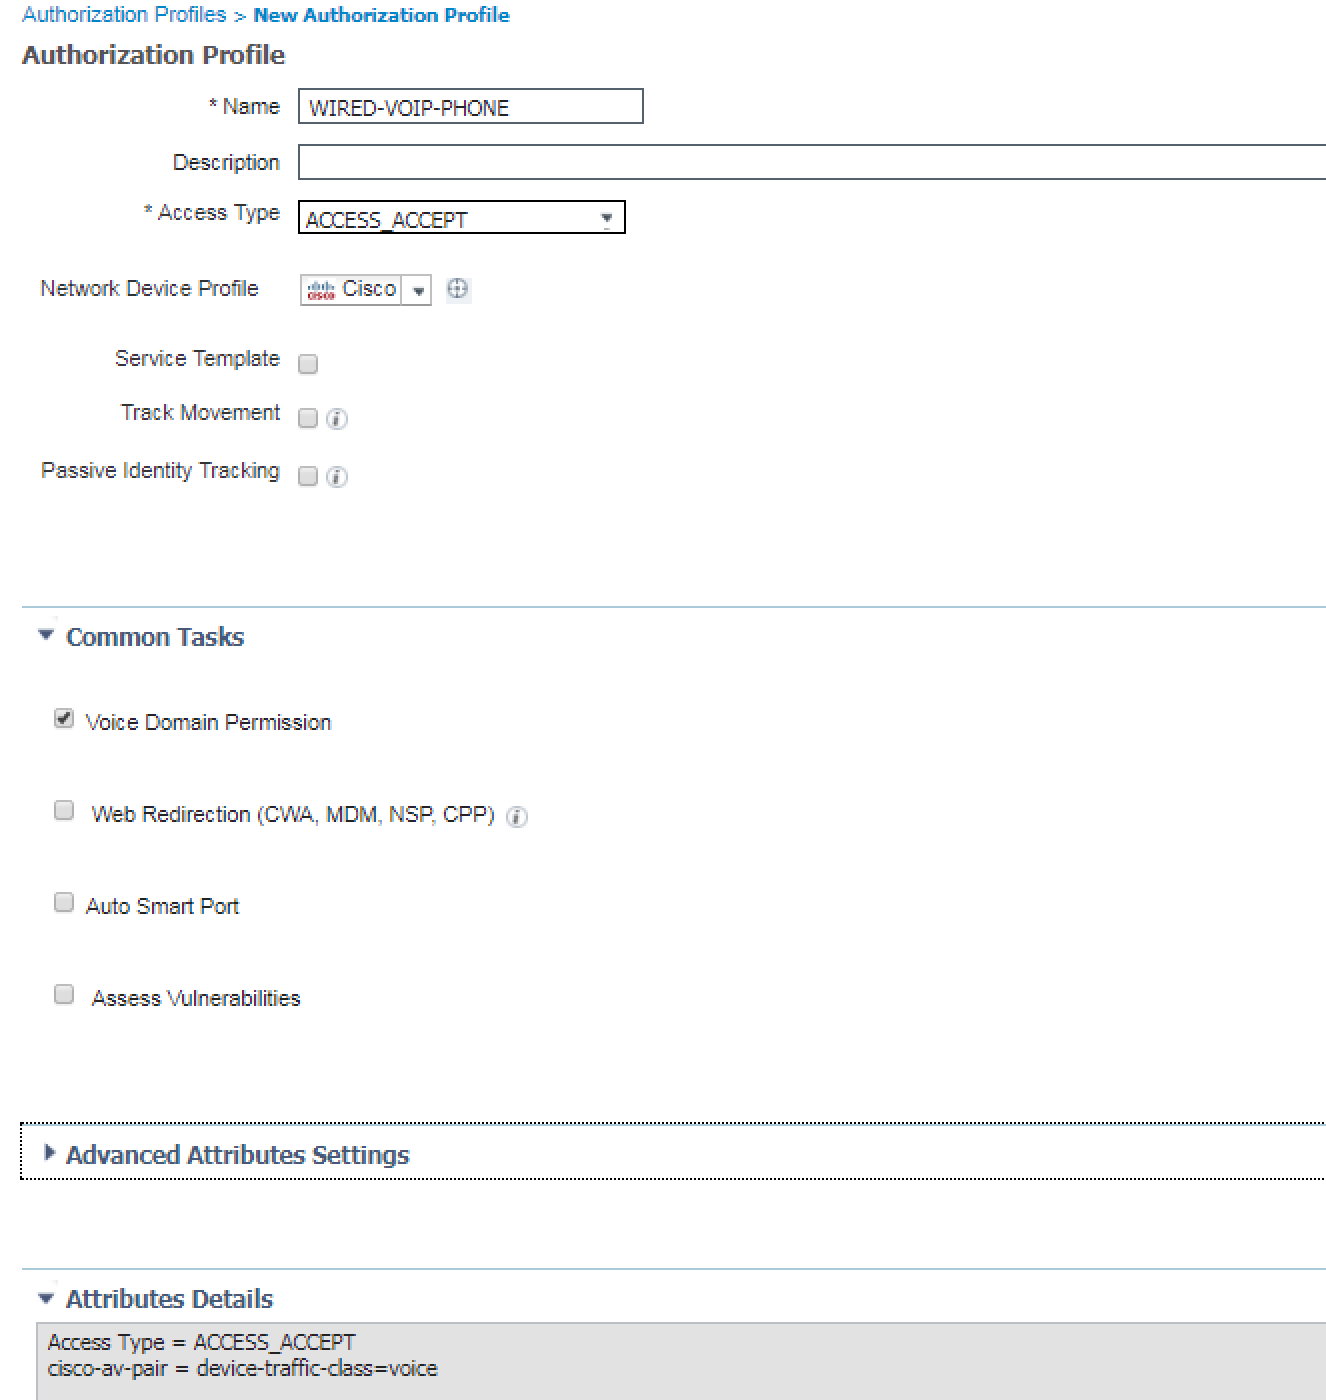
This Authorization Profile, WIRED-VOIP-PHONE, is the first different Authorization Profile we are going to create. Here we are still using the ACCESS-ACCEPT Access Type, but there isn’t a DACL. Install we are permitting the device to use the Voice Domain.
Below is the screenshot showing this new configuration.
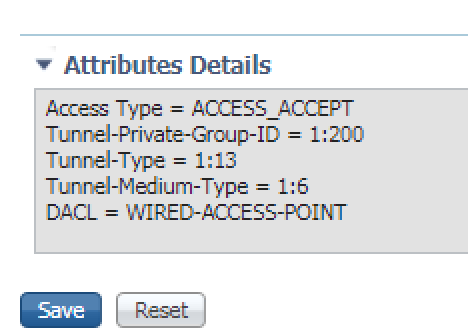
For this next Authorization Profile, WIRED-ACCESS-POINT, we are doing a number of different permissions. Here we are doing ACCESS_ACCEPT, calling a DACL named WIRED-ACCESS-POINT, and a VLAN Override to vlan 200.
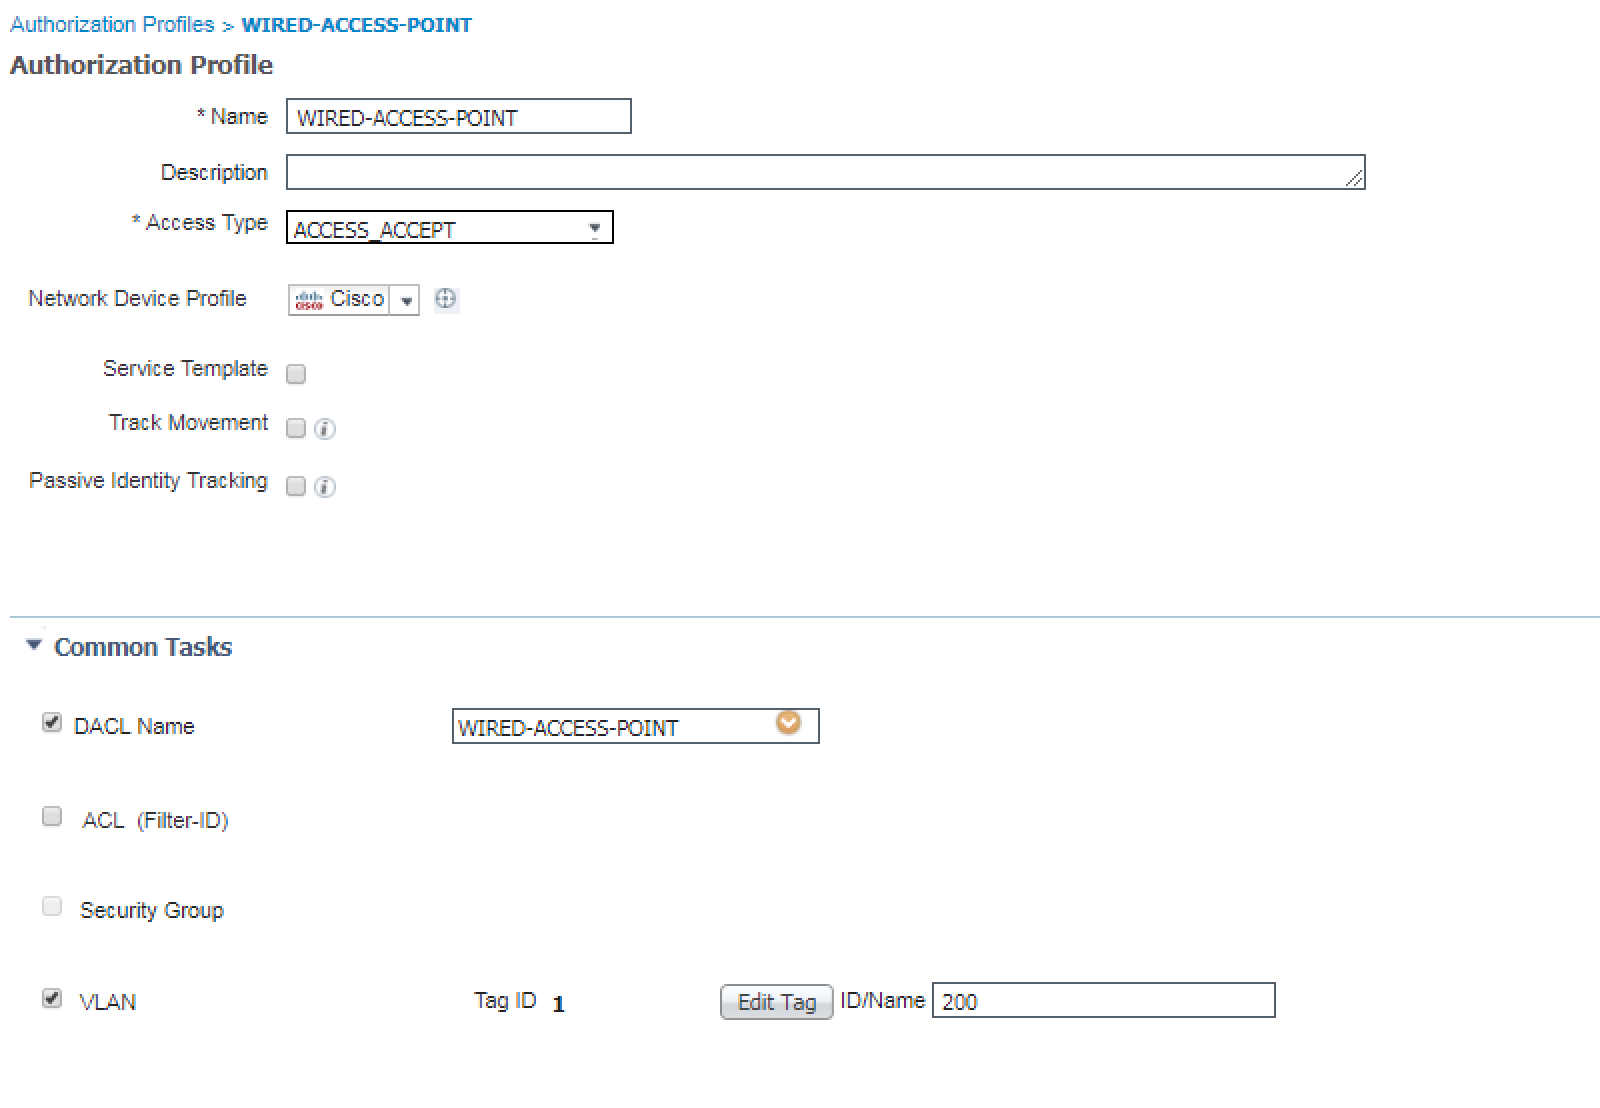
If you haven’t noticed yet, there is an Attributes Details box at the bottom of the screen that shows all of the settings configured, in radius attribute terms. This can be useful if you are adding a number of different permissions in you Authorization Profile.
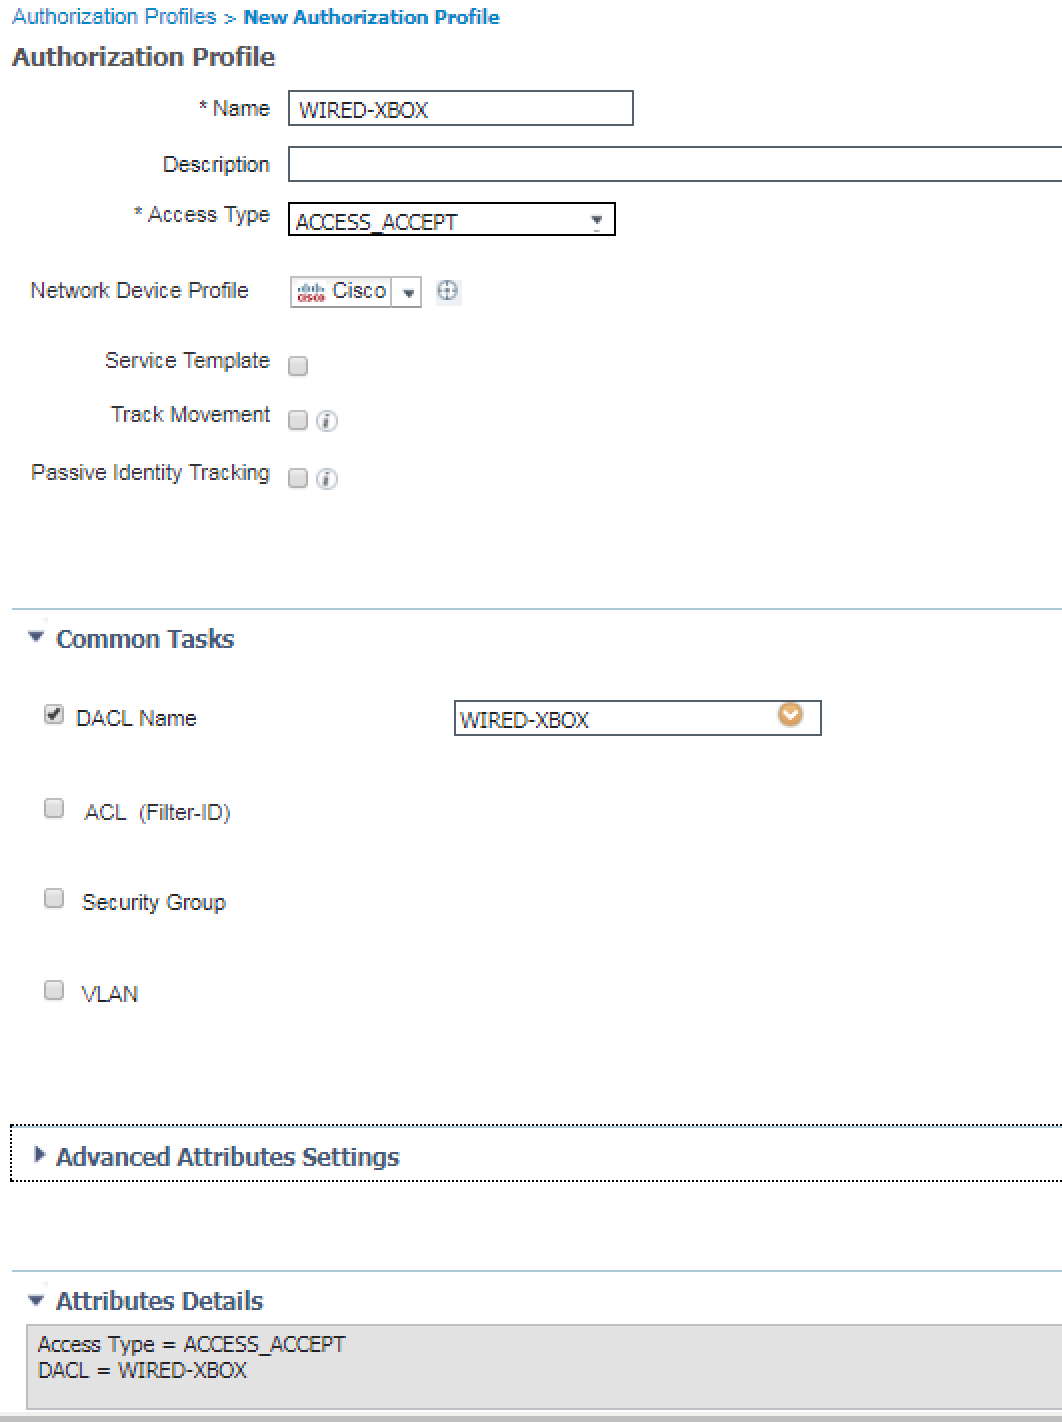
The last Wired Authorization Profile that we are going to create is our WIRD-XBOX Authorization Profile. Like the majority of our Authorization Profiles, we are using ACCESS_ACCEPT and the corresponding dACL called WIRED-XBOX.
Thats it! We now have all of our Wired Authorization Profiles created. Remember these are the permissions that will get applied to a Use Case after a device or user has been authenticated. Authentication always happens first, its Step 1, then Authorization happens, which is Step 2.
Related Resources:
Cisco ISE Community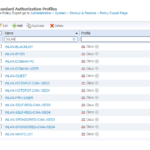
Ask questions and give feedback
- You can leave a comment on the blog!
- You can leave a voicemail at (617) 913-4103
- You can email us at Feedback@zigbits.tech
Engage with Zigbits further:
- Subscribe to the podcast on an iPhone or on an Android
- Follow Zigbits on Twitter!
- Follow Zigbits on LinkedIn!
- Follow Zigbits on Facebook!
Engage with me further:
Transparency:
This post may contain affiliate links to products or services where I may receive a level of compensation from your actions by following those links. This is seamless to you and does not add any additional cost to the products or services in question. In addition, I do not let any affiliate relationship cloud my judgment or my recommendation of a product or service. My recommendations will always be above reproach. This is my commitment to you Ziglets!